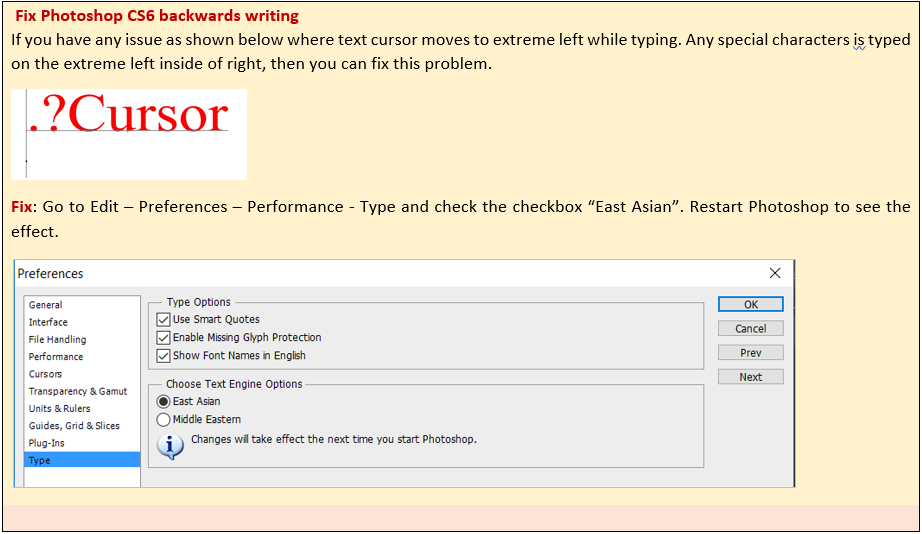
Type Tool in Photoshop
Type Tool in Photoshop is used to write texts on the canvas in various format. Note that the text written will be Vector text and can be scaled to any size without losing quality of the text.
There are various ways, a Text can be written:
a) As single line text
b) Multiline text in Textbox
c) Along a given Path
We will see each one by one:
(a) As single line text
We can write the Text in horizontal or vertical direction using Horizontal Type and Vertical Type tool respectively.
Let’s see some examples on these Tools and different text options on Option bar and Text window.
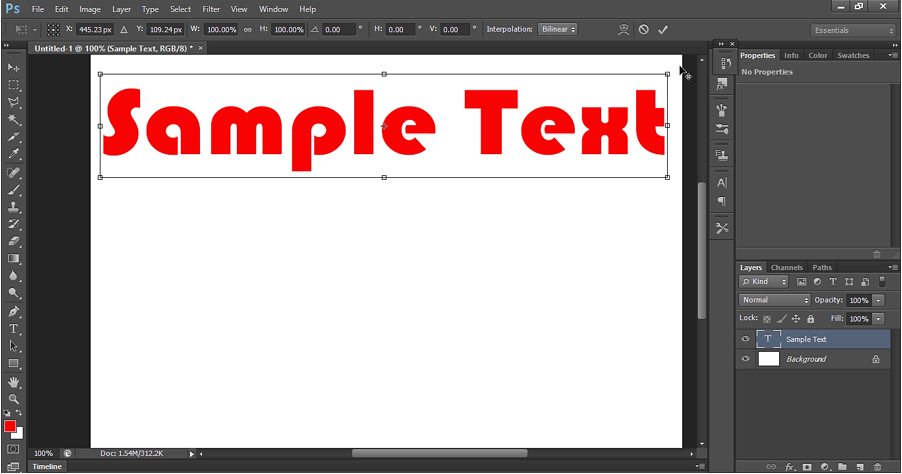
i. Horizontal Type Tool Example
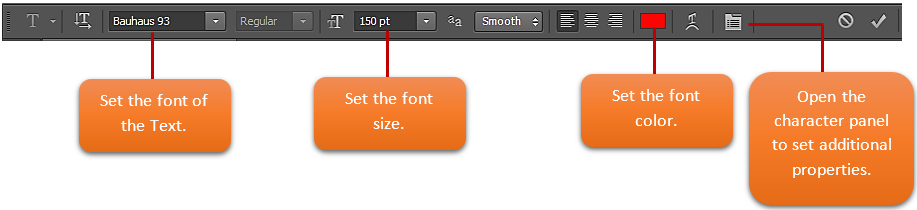
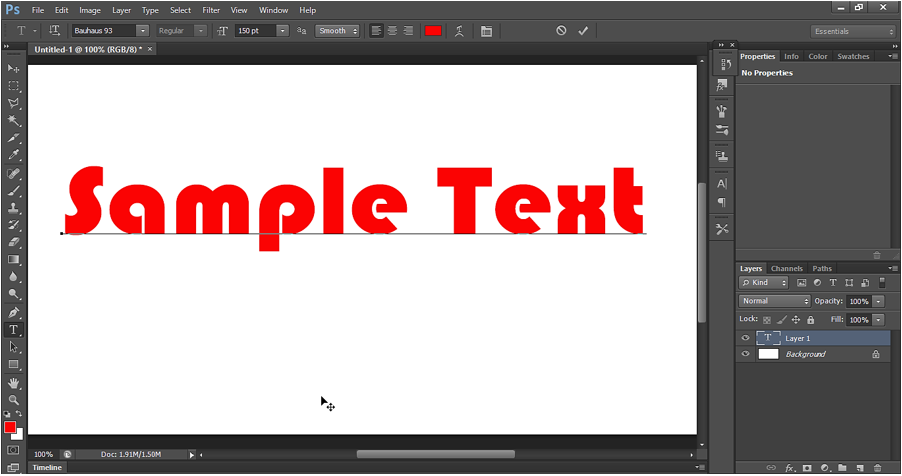
Select Horizontal Text tool  in Photoshop and write something on the canvas. We can set text font, size, font styles etc. on the option bar.
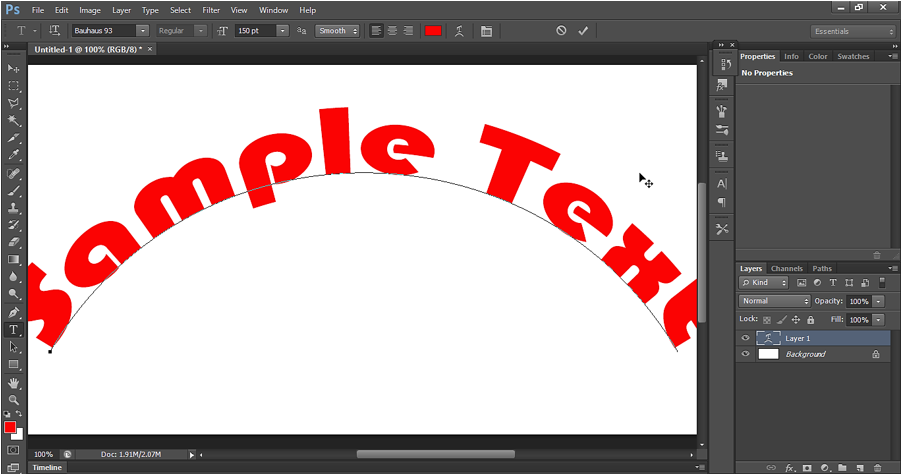
Let’s write something on the canvas:
We can create warp text by clicking the warp icon  .
.
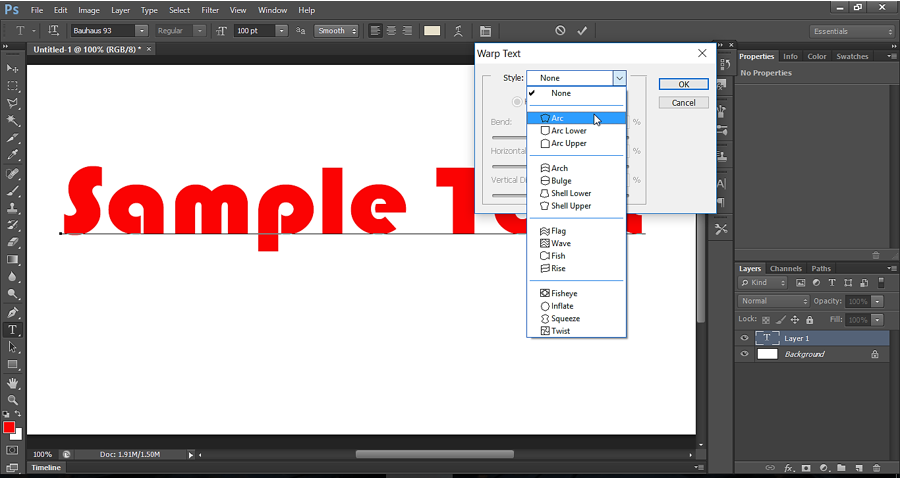
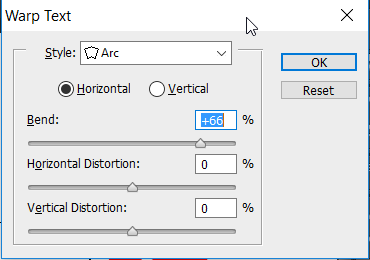
After Text Warp settings, we get below output:
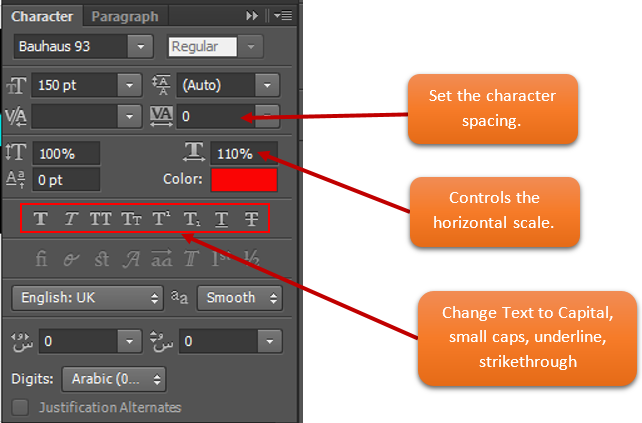
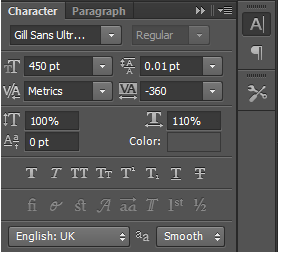
For more advanced settings, we can go to character window by clicking on the icon  . When we click, a new panel is opened. In this character panel, we can control the spacing between the letters or spacing between the texts or can control the horizontal scaling of the character.
*Note: We must select the Text on the canvas to see the effect of character panel’s properties.
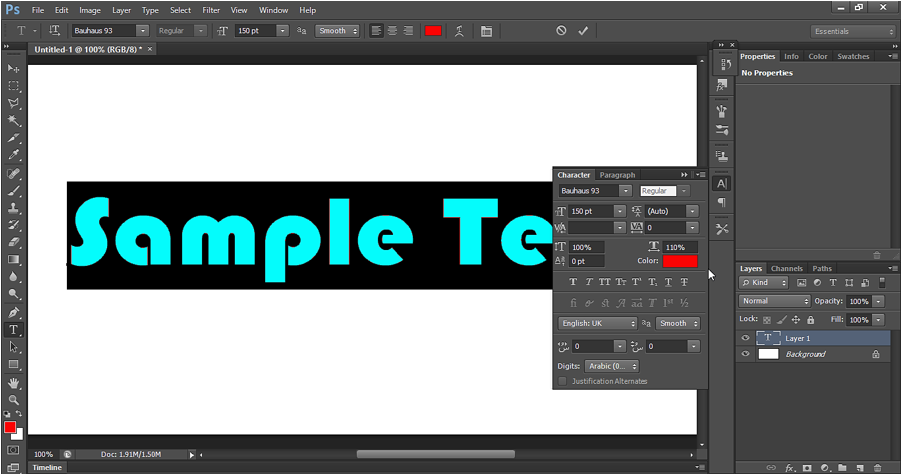
Below is the Character Panel:
How to commit changes:
Accept the changes for the text layer by doing one of the following:
Click the Commit button  in option bar.
Press Ctrl + Enter to commit the change.
Transform Text
After committing the changes, we can transform the Text. Press Ctrl + T on while the Text layer is selected. It creates a transform control around the text. You can transform the form with this.
Let rotate the Text and reposition it in the center of the canvas.
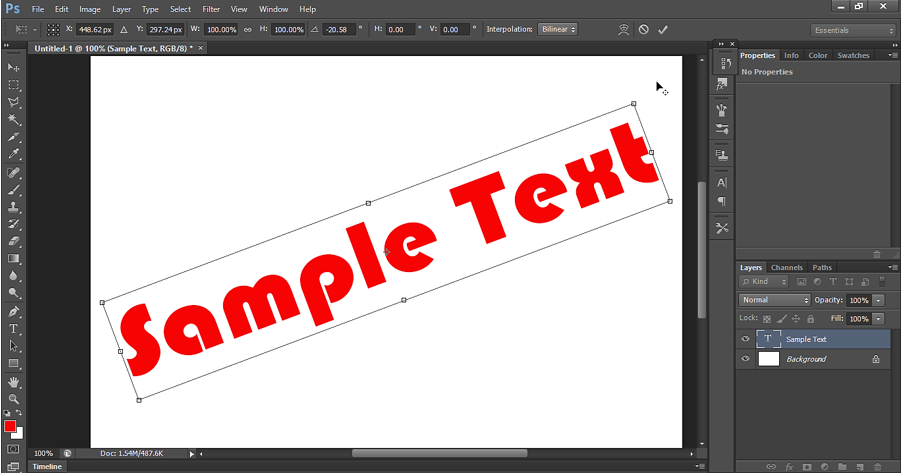
Press Ctrl + Enter to accept the changes.
Re-edit the Text layer
If we want to edit the Text layer again. For this select the Text layer then select the horizontal type tool. Then click on the text written on the canvas. The Type tool will be activated and we can make changes to the Text.
***Note: As we know the text written here is Vector graphics. If we rasterize the text layer (right click on text layer + Rasterize type), then we cannot edit the text again using Horizontal type tool.
Layer style on Text layer
We can give many styles to the Text layer. In Blending options window, we can apply shadow, stoke, emboss, gradient, pattern to the Text layer to create different Text effects.
First write something on the canvas with Horizontal type tool as shown below.
Then, right click on the text layer and select Blending options.
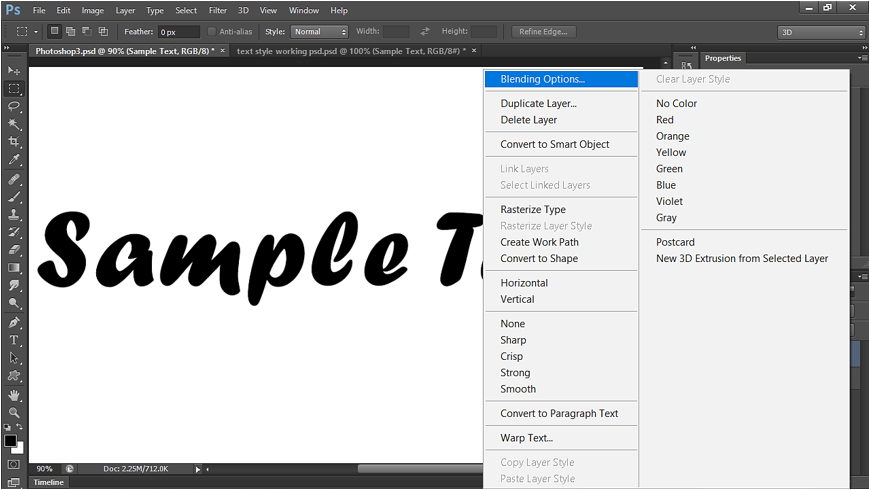
It opens a Layer style window. We will use different Layer styling elements to give the text an awesome look.
Let’s apply different Layer style elements to get stylish text:
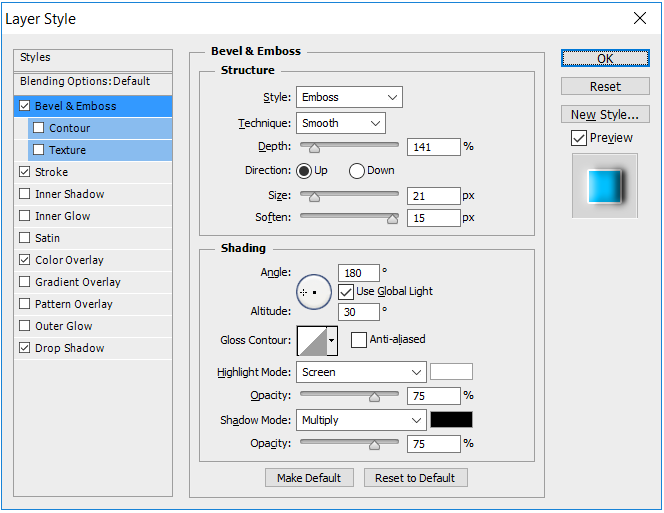
=> SET THE BEVEL & EMBOSS AS SHOWN BELOW:
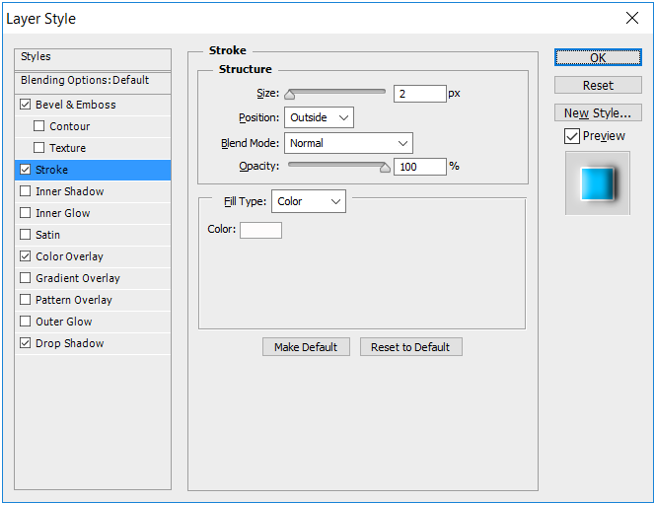
=> SET THE STROKE AS SHOWN BELOW:
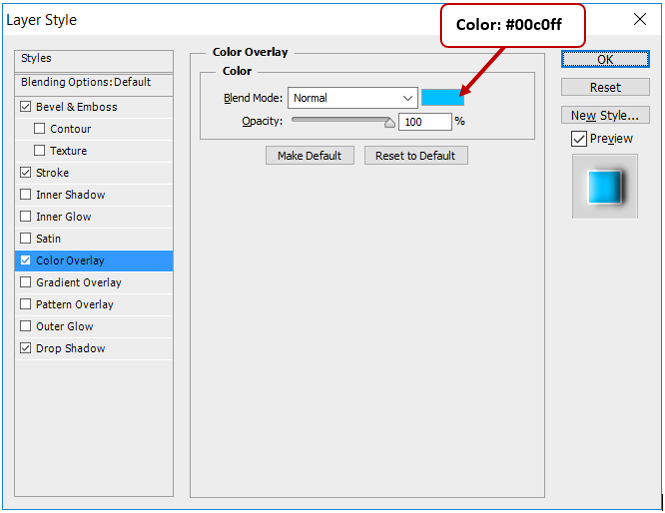
=> SET THE COLOR OVERLAY AS SHOWN BELOW:
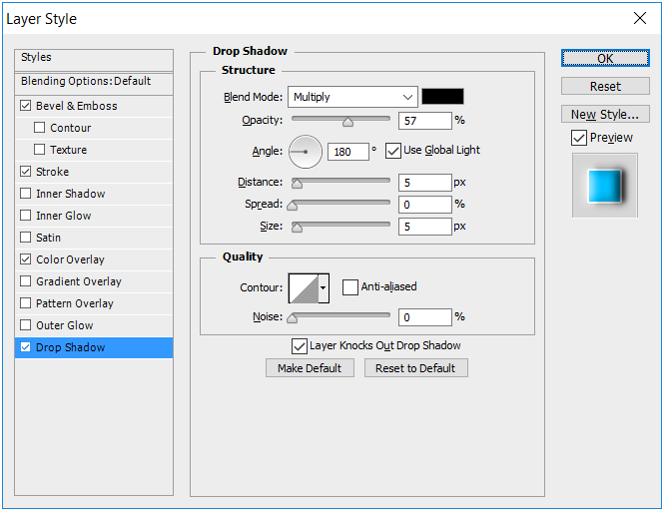
=> SET THE DROP SHADOW AS SHOWN BELOW:
After applying above Styling elements, we get below Output:

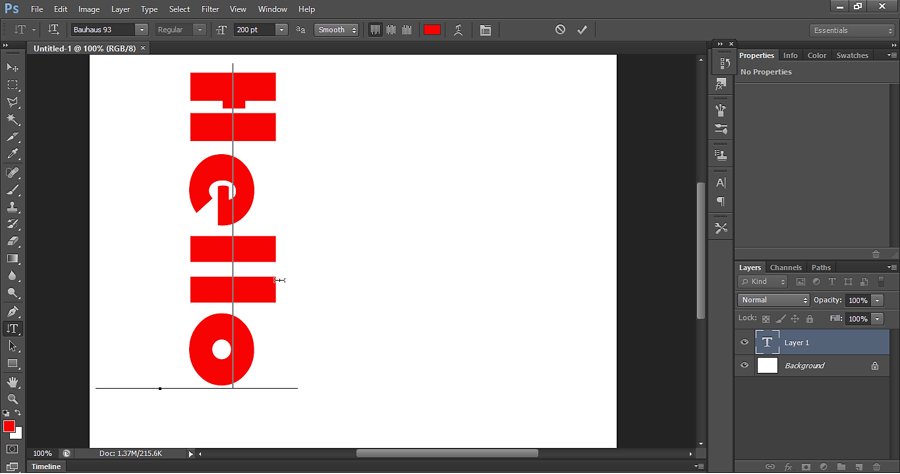
(ii) Vertical Type Tool Example
Vertical Type Tool work pretty much like Horizontal Type Tool. But instead of writing the text in Horizontal direction, it writes the Text in Vertical direction.
To use Vertical Type Tool  , select it from the toolbox. Write something on the canvas. The text will be written in vertical direction as shown below:
We can change the font settings in option bar as we did for Horizontal type tool. Same way, we can set additional feature in Character panel.
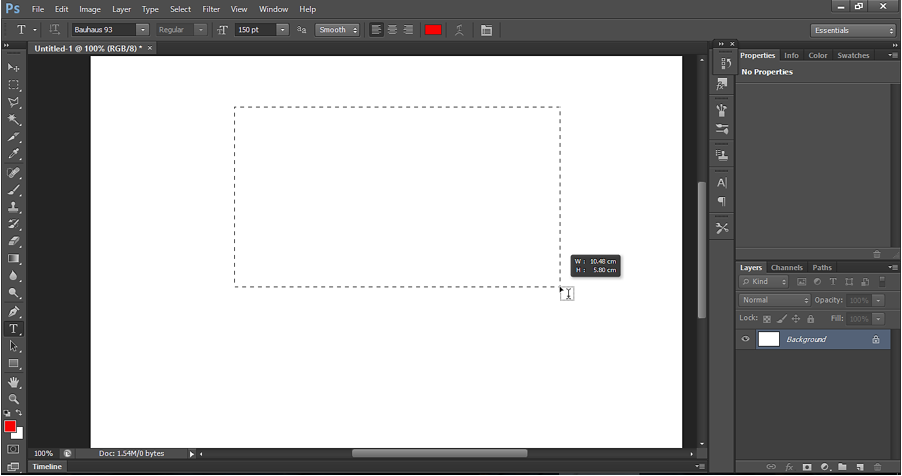
(b) As Multiline text in Textbox
We can draw multiline text or paragraph using the same Type tool.
Select horizontal Type Tool. On the canvas, drag the cursor to create a box when the cursor looks like this  . The box limits the paragraph text within it.
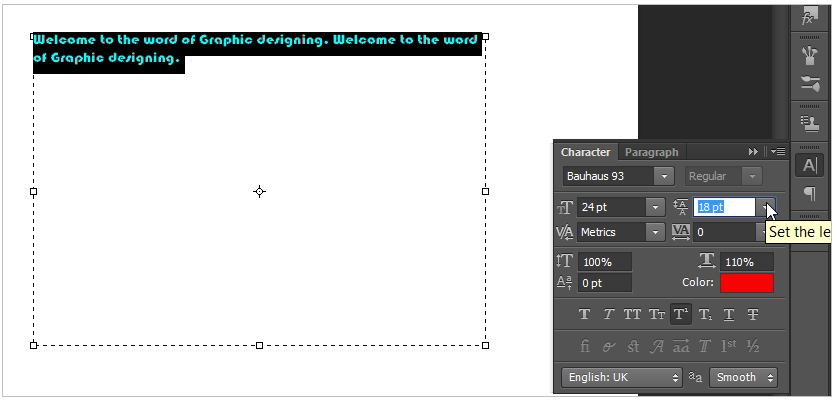
If the text is overlapping on each other instead of coming to the 2nd line, then set the increase the leading  in Character panel as shown below.
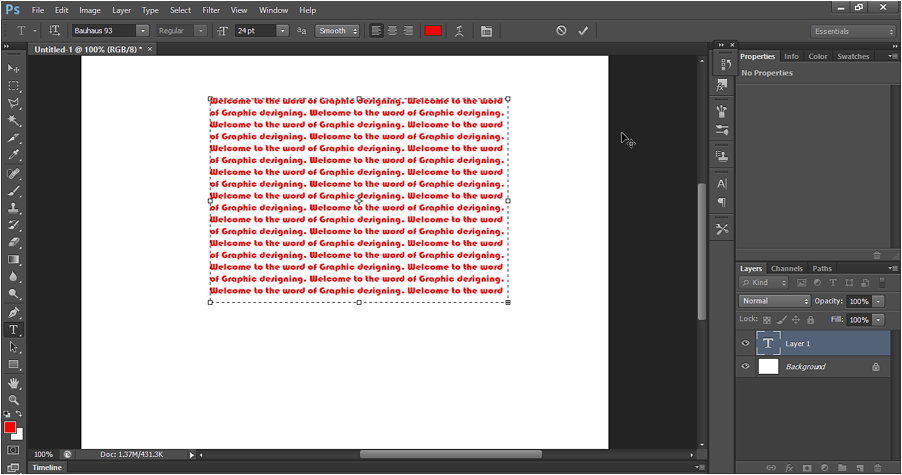
Below is how it looks like:
(c) Along a given Path
We can also draw the text along a path. We can create a path using any Selection tool or pen tool. We can also draw text on the outline of a shape created with shape tool.
Let’s see it with an example:
(i) Text on a Shape
Select shape tool. We have various option under the shape tool as shown below:
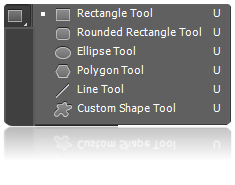
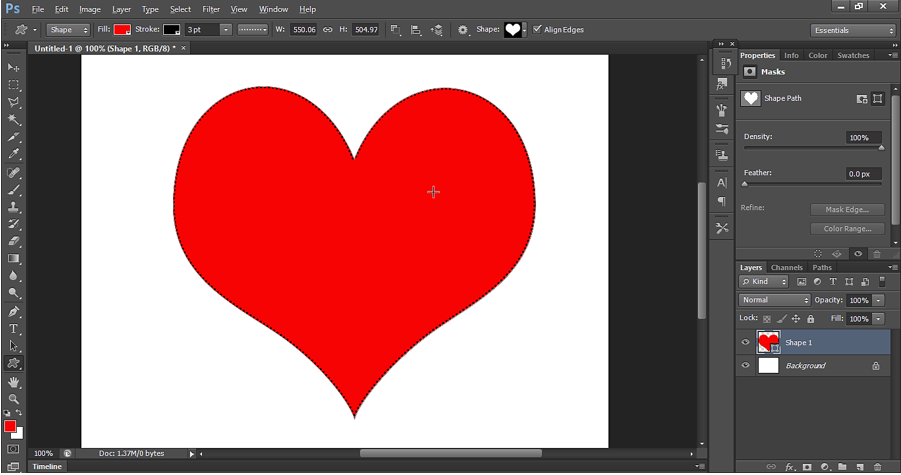
Let’s select Custom Shape tool and draw a heart shape on the canvas.
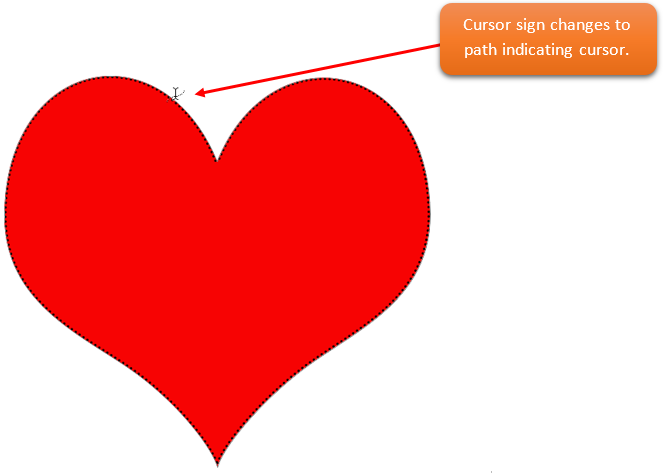
Select Horizontal type tool and take the cursor on the outline of the shape until the cursor change to a path indicating cursor, as shown below:
Now start typing as shown below.

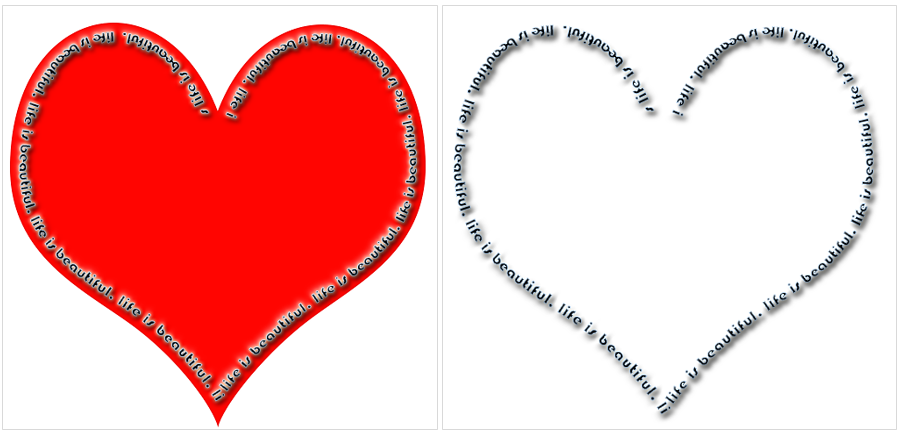
Write the Text completely on the outline. Then right click on the Text layer and apply Blending options to give it a text style.
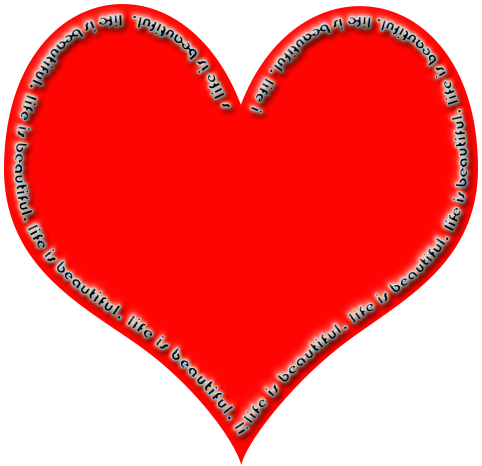
Let’s hide/delete the shape layer and we are left with Text layer, which appears in the shape of heart.
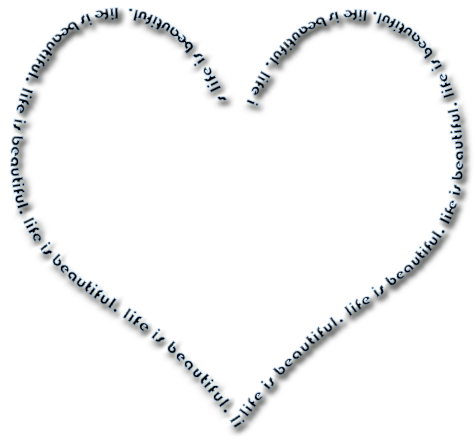
Output- Text on shapes outline
(ii) Text on the Selection
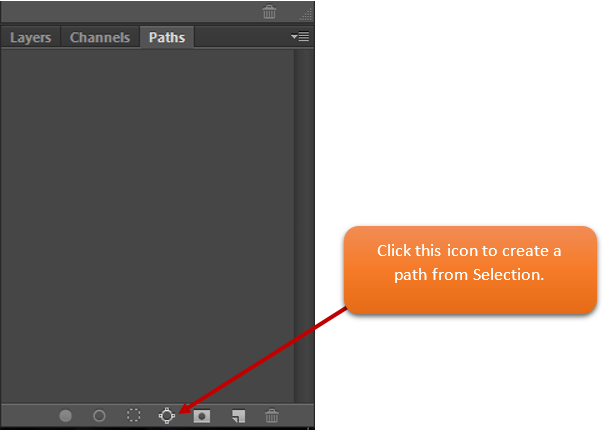
We can also write text by making Selection. After making Selection, we can convert it to a Path. For this go to path panel and click icon  appearing at the bottom of the panel.
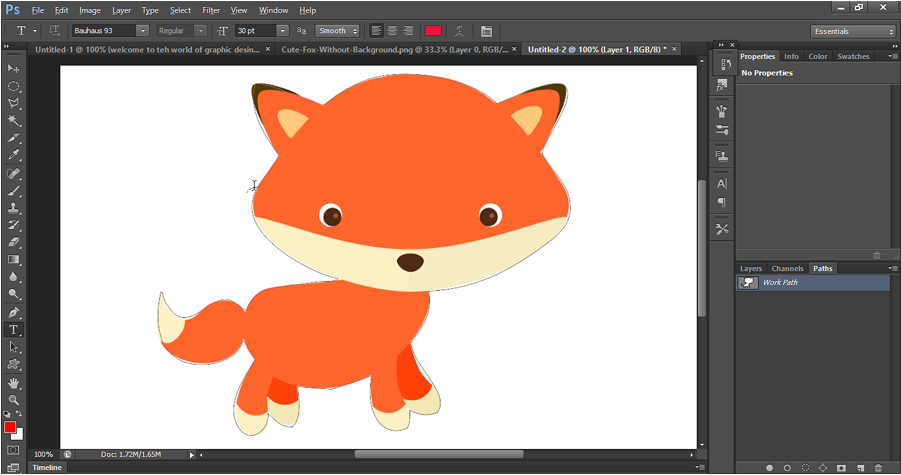
Let’s open an image as shown below:

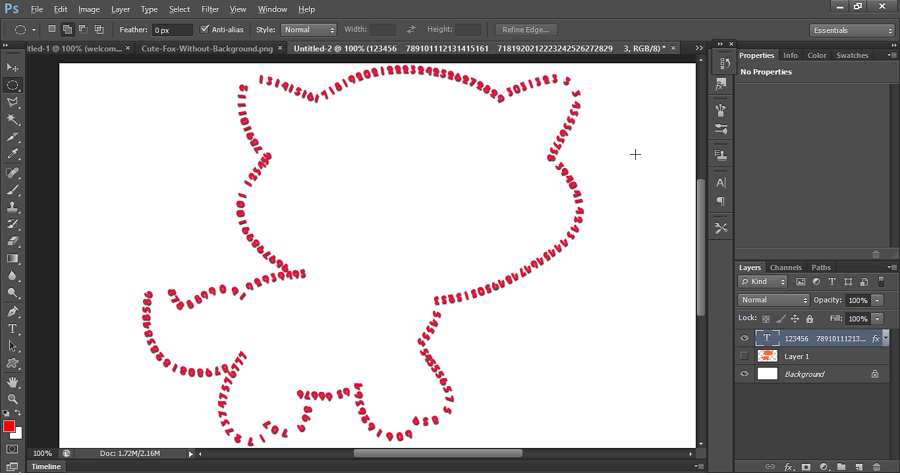
Now make Selection of the outline using magic wand tool.

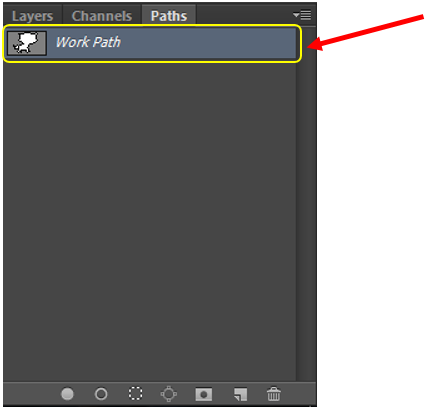
Now go to paths panel and click on the icon as shown below:
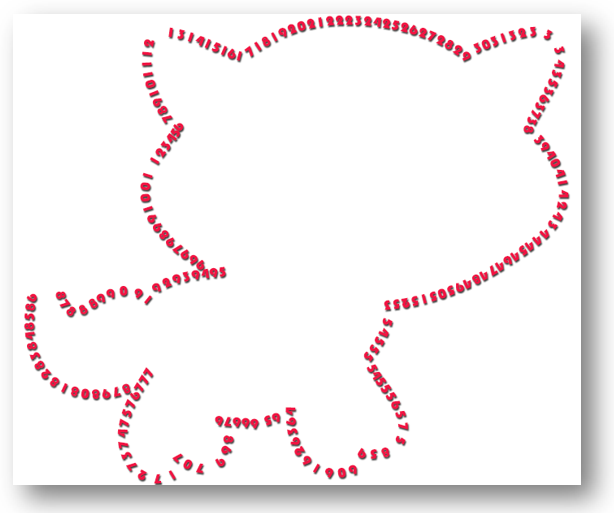
Work path is created as shown below:
Once we have the path, select Horizontal type tool and take the cursor on the path outline until the cursor changes to path cursor. See below.
Start typing now. After the typing is complete, we get below text outline.
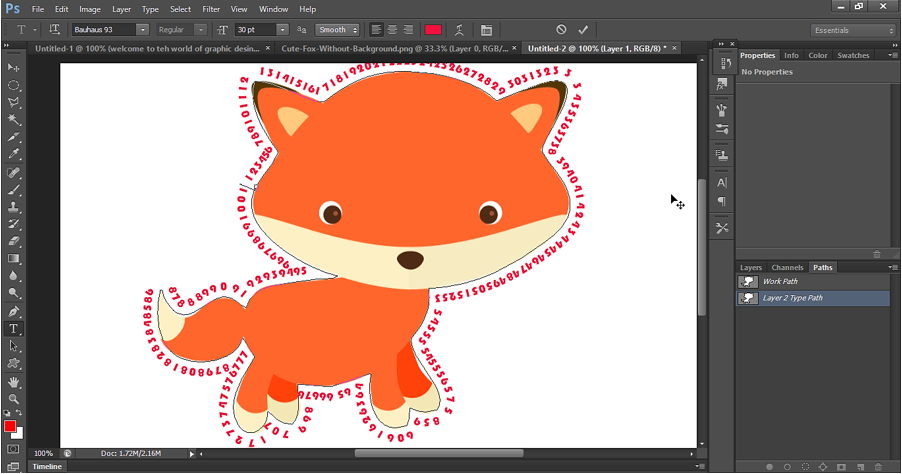
Output- Text on shapes outline
Type mask Tool
We can use the type mask tool to create a Selection in the shape of text. We can then create various effects with the copied or cutouts text from the Selection.
There are two types of mask tool:
(i) Horizontal Mask Tool
(ii) Vertical mask Tool
Horizontal and Vertical Mask tool is used to make horizontal and vertical selection of text respectively. See below examples:
(i) Horizontal Mask Tool Example
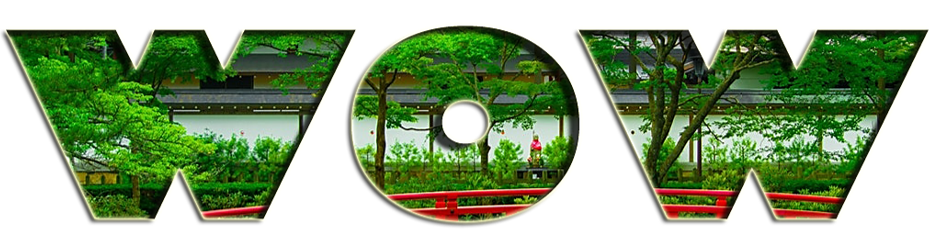
It can be used to make Selection out of Text on the canvas. Once we have the selection, we can do right click to do Layer via Copy or Layer via cut and can produce various designs.
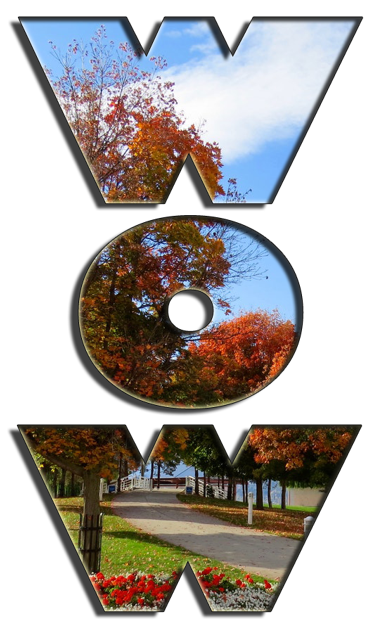
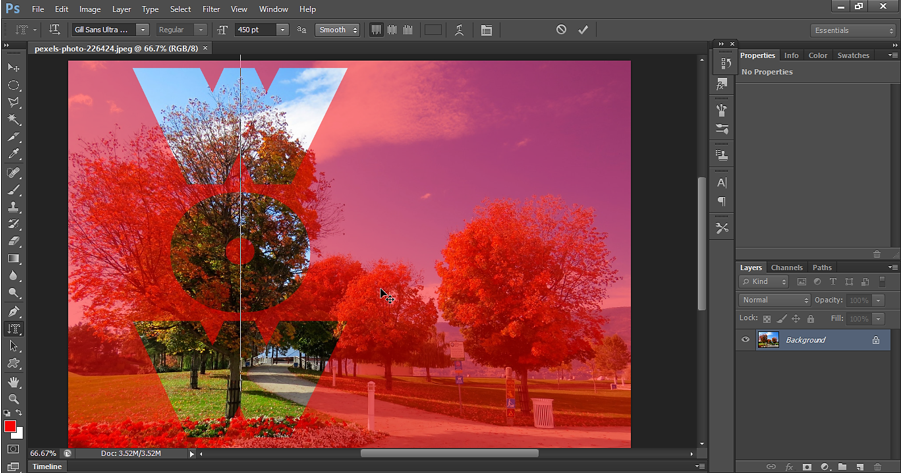
Let’s open below image in Photoshop.
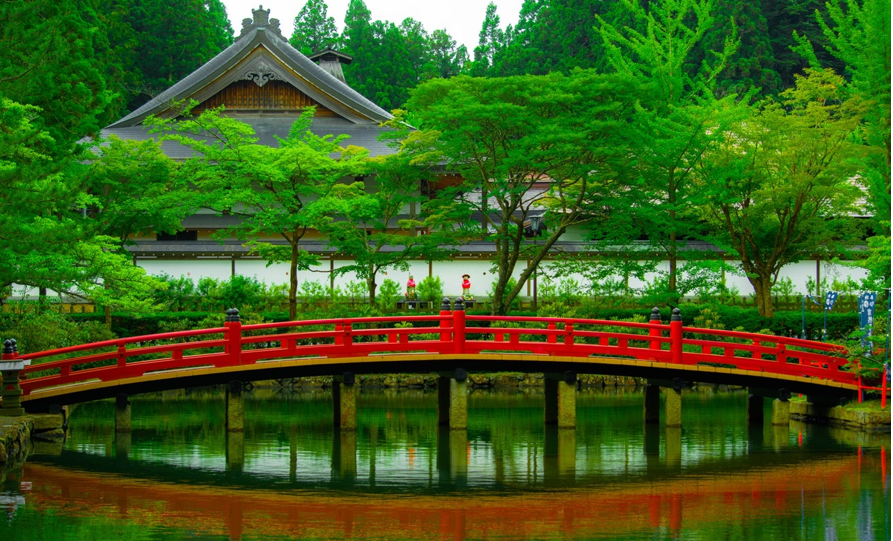
Select horizontal mask tool and type some text on the image.
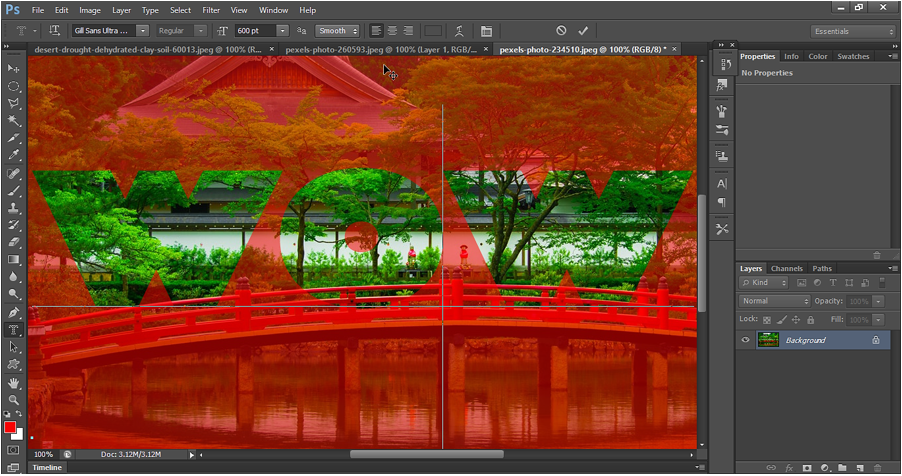
Now click on Rectangular selection tool and we can see a selection on the canvas. Now right click inside the selection and select “Layer via copy”.
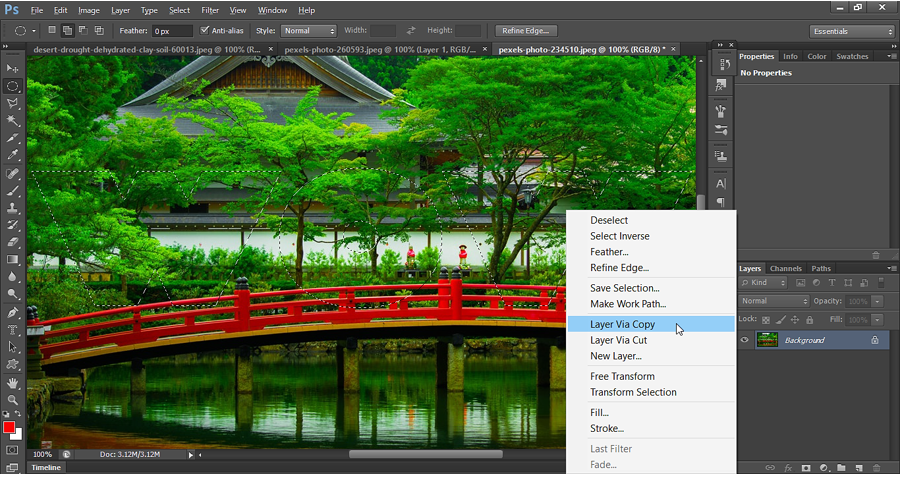
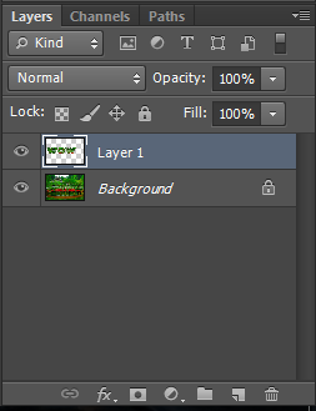
New text layer is created when we do Layer via copy. See Layer 1.
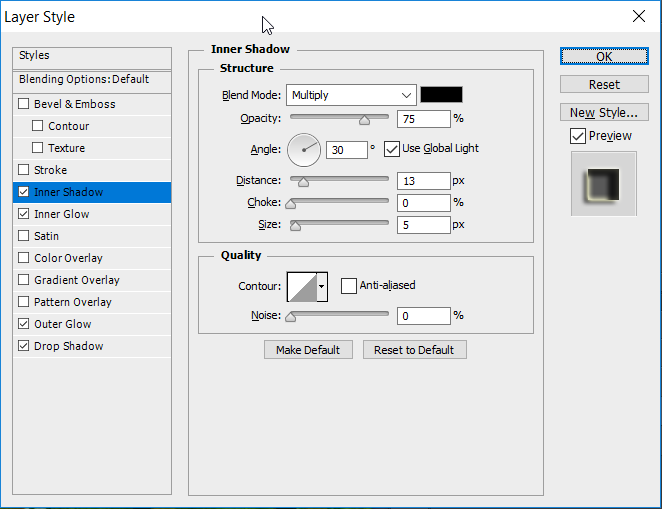
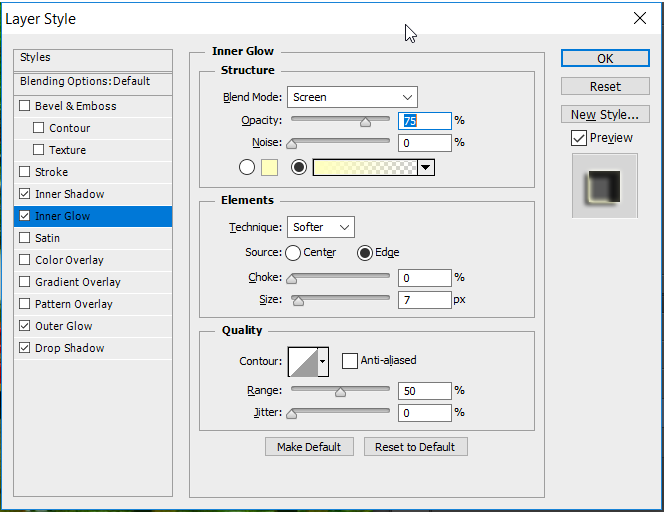
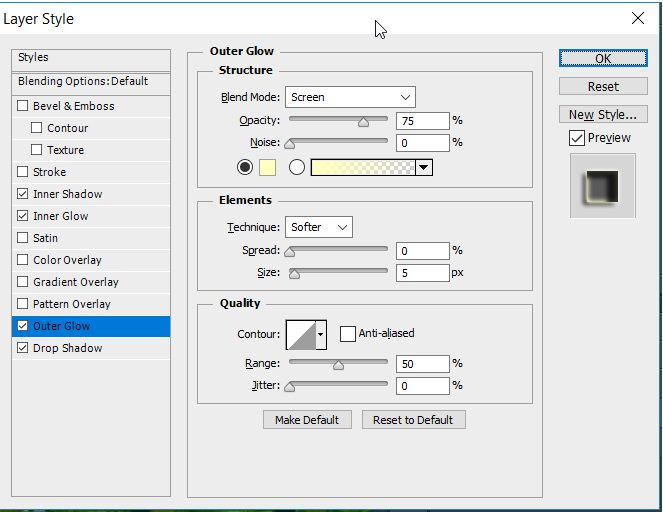
Now right click on the layer and select Blending options to apply layer style. Apply the layer styles as shown below:

Hide the background layer. Finally, we have below output. We can use save for web option with Interlaced selected while saving. This creates the .PNG file with transparent background.
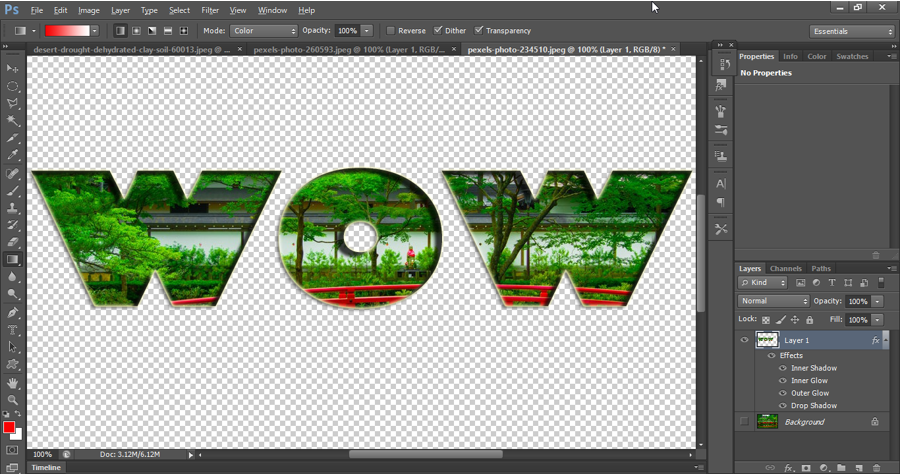
Output - Horizontal Mask Tool
(ii) Vertical mask Tool Example
Like horizontal mask tool, we can use Vertical mask tool to create vertical mask of text.
Let’s open an image as shown below:

Now select Vertical Type mask tool and write something on the canvas. If the spacing between character is too much, then reduce it by adjustment in character panel.
Vertical type mask will look like below:
Now click on Rectangular selection tool and we can see a Selection on the canvas. Now right click inside the selection and select “Layer via copy”. Now right click on the layer and select Blending options to apply layer style. Apply the layer styles as above in Vertical Type mask tool. Then hide the background layer. Below is the final output:
Output – Vertical Type Mask Tool