Photoshop Layers Introduction
Photoshop layers is the most important feature of Photoshop, which help us to arrange images and work on a specific segment of an images.
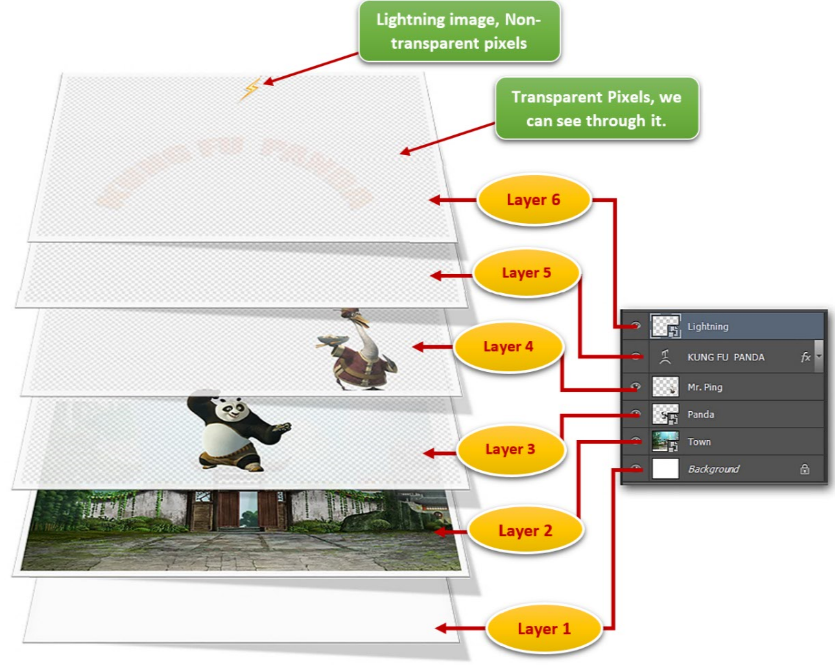
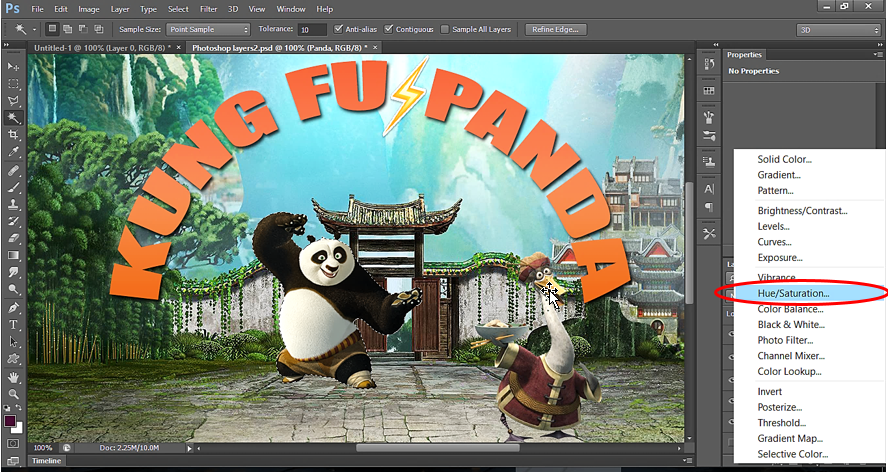
To understand the layer, take an example. Suppose, we have an image as shown below. This is a KUNG FU PANDA poster.
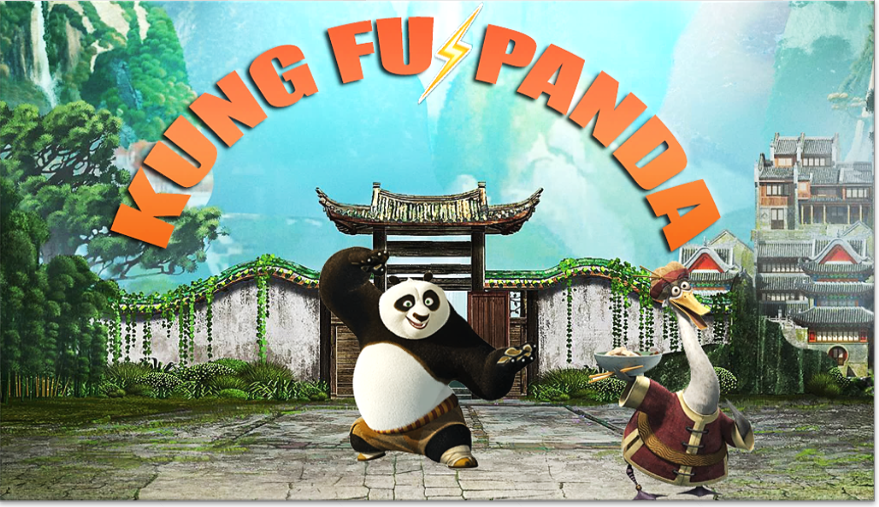
Now, let’s try to find out answers to few questions, regarding above image:
a) Can we move Panda from one place to another without affecting other images in the poster?
b) Can we replace Panda image with some other image?
c) Can we change the font family or font size or font color of the text “KUNG FU PANDA” anytime, whenever we want it?
d) Can we change the size of lightning image which is in located in between the KUNG FU PANDA Text?
e) Can we change the background of Panda with some different background?
In a nutshell, Is it possible to manage each part of above image independently?
The answer is Photoshop Layer. We can do it in Photoshop application with the help of Layers.
The Layer in Photoshop contains individual image or Text and those individual images or Text can easily be edited/managed in Photoshop without affecting any other image segment.
Hence, to manage each image segment in above poster, we need to create below layers so that each image segment can be managed independently:
a) Panda layer This layer will have Panda Image
b) Mr. Ping layer This layer will have Mr. Ping Picture
c) KUNG FU PANDA text layer This layer will have KUNG FU PANDA text
d) Lightning layer This layer will have Lightning image
e) Town background layer This layer will have Town background image
Example - How to use Layers in Photoshop:
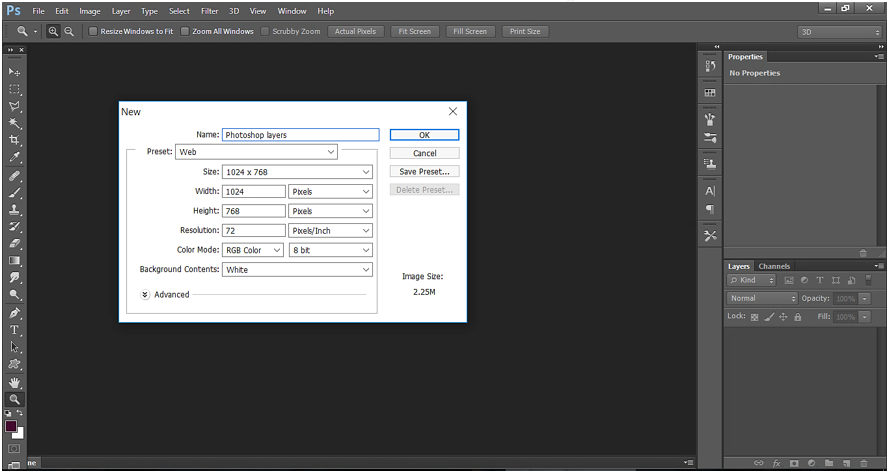
Open Photoshop application and create a new document. Below we have opened a new document:
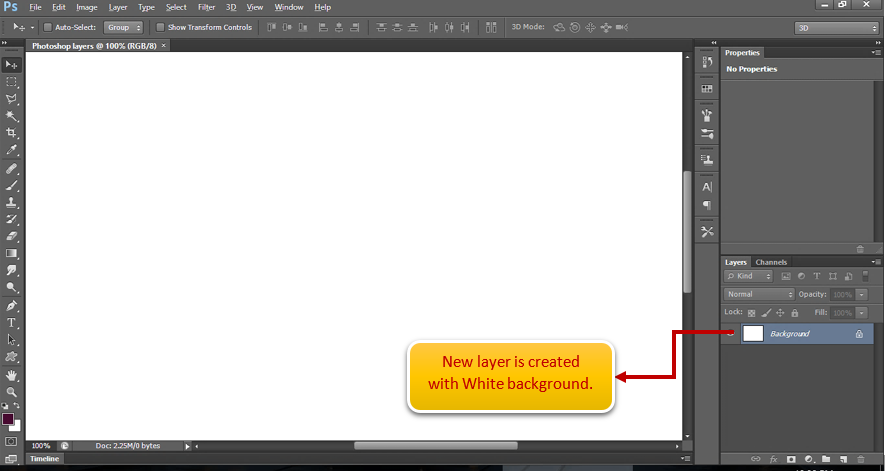
When we Open a new document, by default a new layer is created with white background as shown below:
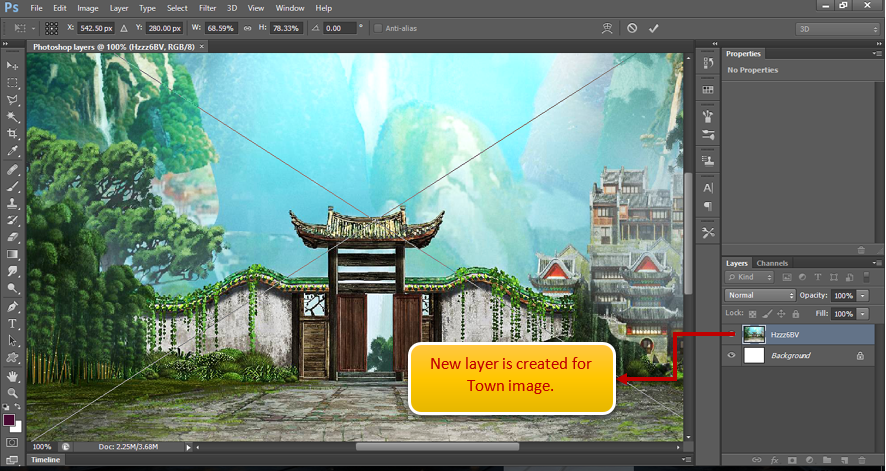
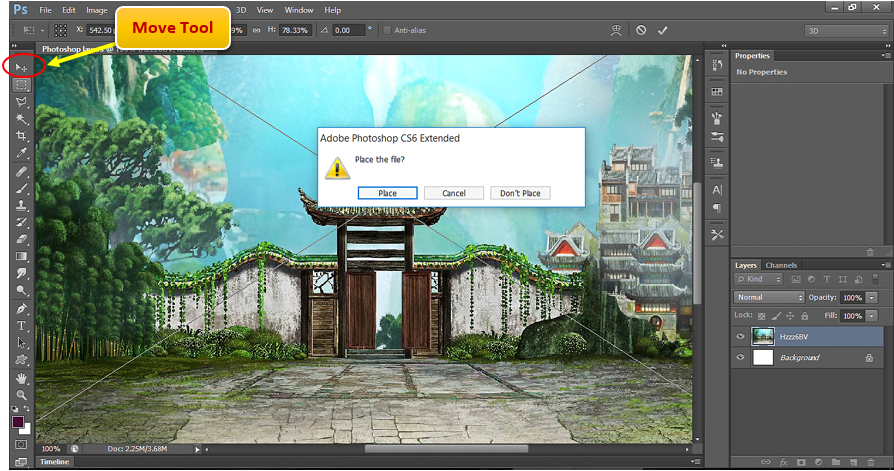
Now drag the Town Image from your desktop to the Photoshop application. A re-size control appears on the dragged image. We can adjust its width and height by using this control.
Also, we can see that a new layer is created for Town image.
Once the re-size is done, just click on very first tool “Move tool”. Then click on ‘Place’ in the confirmation window as shown below:
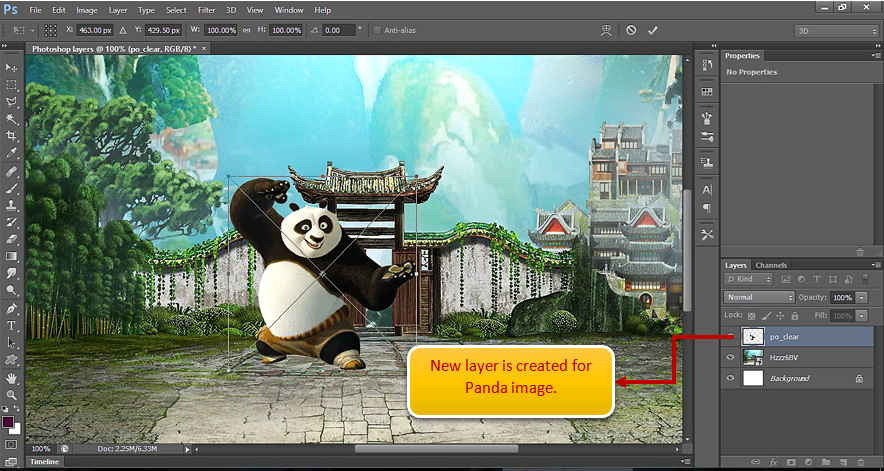
Now drag the Panda image from your desktop to the Photoshop application.
*Note:
Make sure that the Panda image has transparent background. Panda Image with Transparent background means, that the pixels of background will not exist in the image and hence will make the background transparent.
After dragging the Panda, we can see a new layer is created for Panda image.
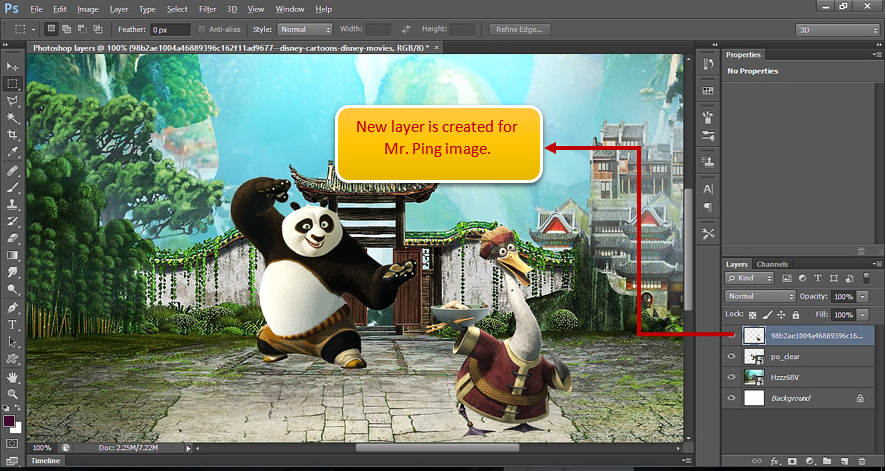
Now drag the Mr. Ping image from your desktop to the Photoshop application.
*Note:
Make sure that the Mr. Ping image has transparent background.
After dragging the Mr. Ping, we can see a new layer is created for Mr. Ping image.
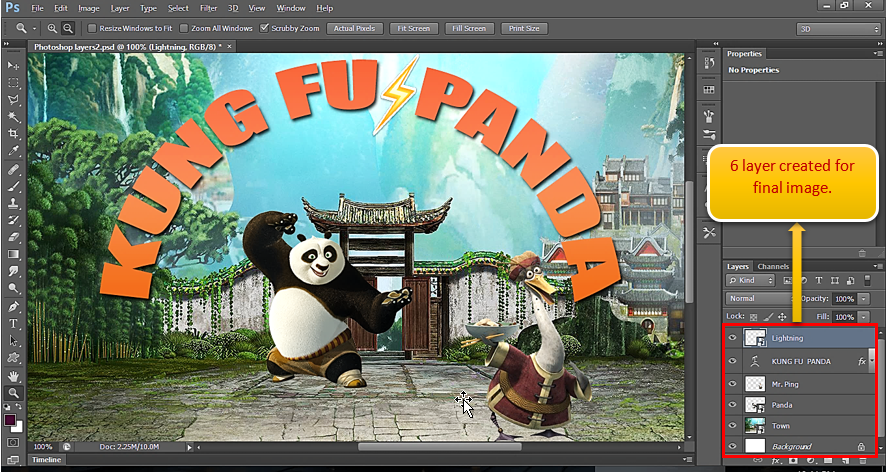
Similarly, drag Lightning image. It creates a new layer with Lightning image.
Then write some Text with Text tool. We will discuss Text tool later. One text layers is created for it.
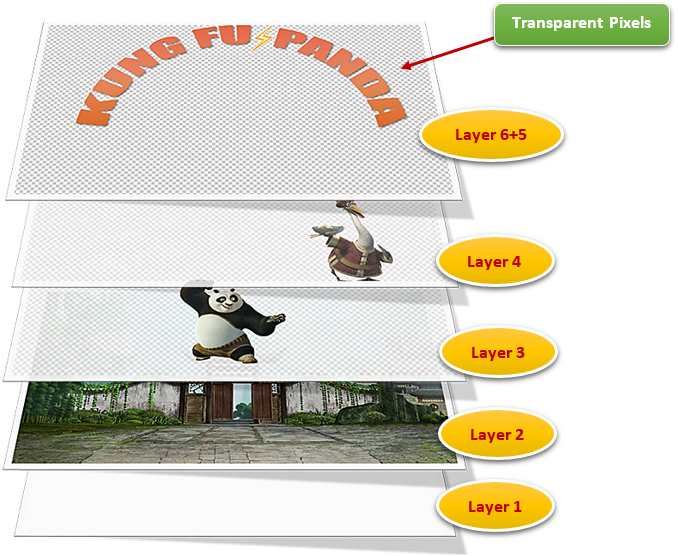
Finally, we have below image with 6 layers as shown below:
If we see above image, it looks like a single image with all the segments (Panda, Mr. Ping & so on...), but in actual all image segments are completely separated with each other and hence can be edited/managed individually.
Hence, from above it is clear that each layer represent an image segment and are stacked one upon another to finally produce the desired image.
See below, how all 6 layers are stacked in Photoshop application:
Above layers are stacked & merged with each other to produce the final image. Let’s see how it happens, in below consecutive steps:
Step-1: Merge Layer 6 into Layer 5
Before we start merging of two layers, lets understand the basics how the merging happens:
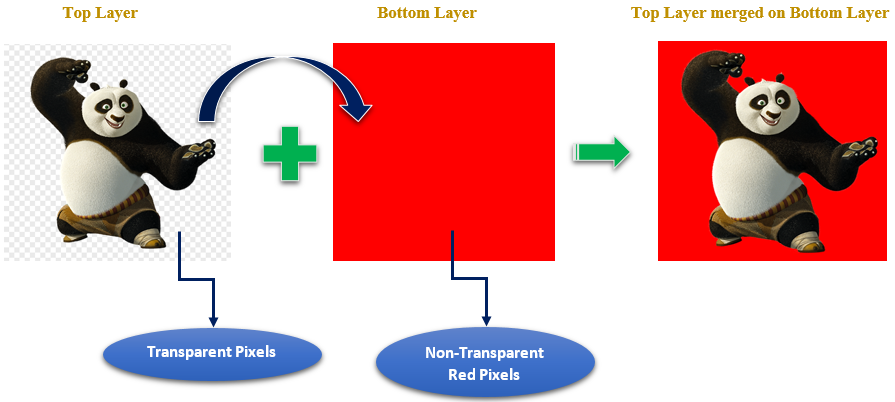
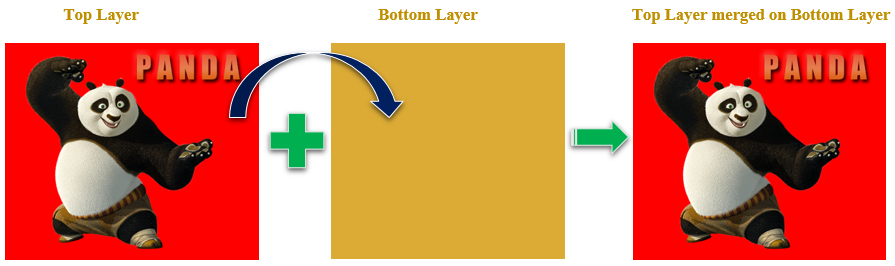
Example-1
In below example, pixels around the Panda image are Transparent pixels. When we combine transparent pixels with Non-transparent pixels, it results into Non-transparent pixels. Hence, the Transparent pixels around Panda image combines with Non-transparent Red pixels to give No-transparent Red pixels around panda in final image.
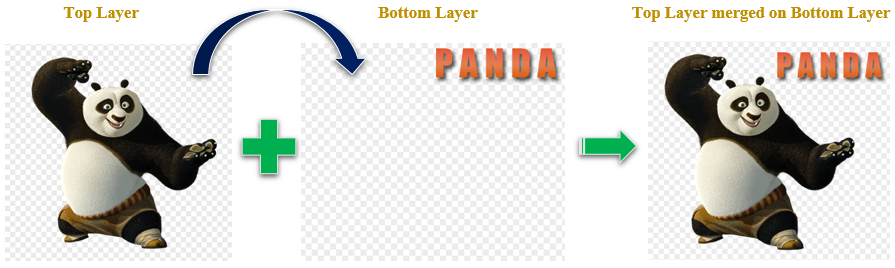
Example-2
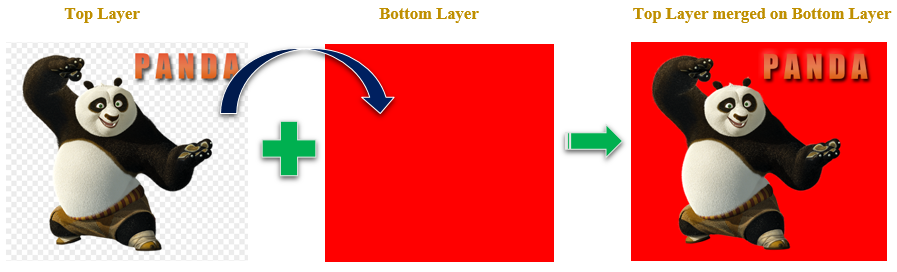
Example-3
Example-4
Now let’s merge all 6 layers into one to finally produce the poster image.
When we merge Layer 6 into Layer 5, then Lightning layer combines with Text Layer to give result as shown below:
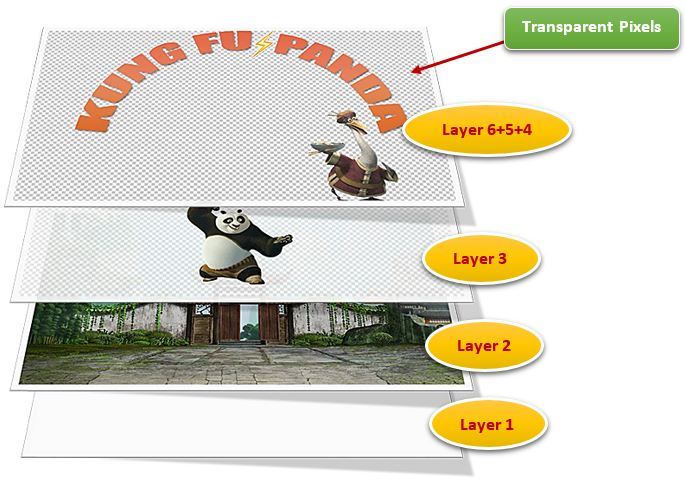
Step-2: Merge Layer (6+5) into Layer 4
When we merge Layer (6+5) into Layer 4, then it gives result as shown below:
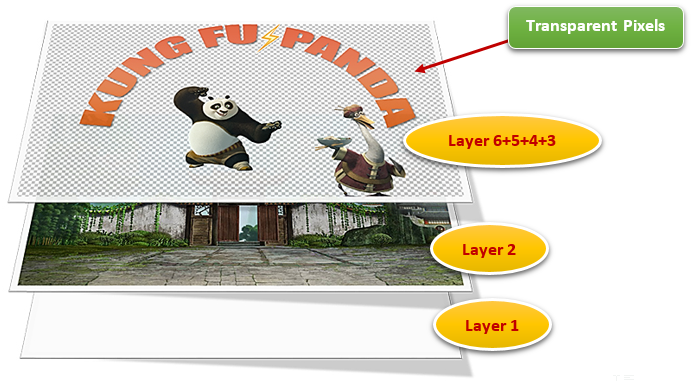
Step-3: Merge Layer (6+5+4) to Layer 3
When we merge Layer Layer (6+5+4) into Layer 3, then it gives result as shown below:
Step-4: Merge Layer (6+5+4+3) to Layer 2
When we merge Layer Layer (6+5+4+3) into Layer 2, then it gives result as shown below:
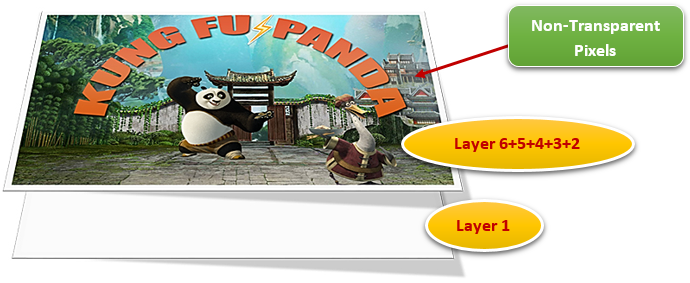
Step-5: Merge Layer (6+5+4+3+2) to Layer 1
When we merge Layer Layer (6+5+4+3+2) into Layer 1, then it gives result as shown below:
*** Note that the pixels around Layer (6+5+4+3+2) are Non-transparent pixels. So, it doesn’t matter what layers comes below it, all those layer will be completely invisible for Layer(6+5+4+3+2). Hence even after overlapping Layer(6+5+4+3+2) will be always same.
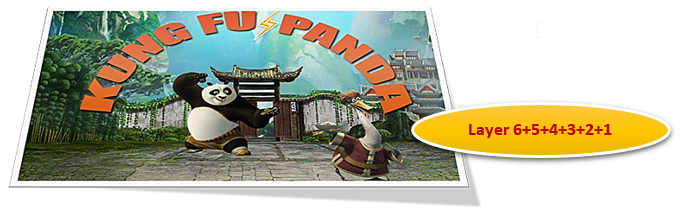
So, finally, we have the Poster image.
Now let’s see how we can manage/edit the image segments in each layer.
Benefit of using Layer:
(1) Edit one Layer without affecting other layers
As discussed, each layer can be modified individually without affecting the other layer.
See example below. Select Panda layer. Once we select the layer, we can edit the Panda image.
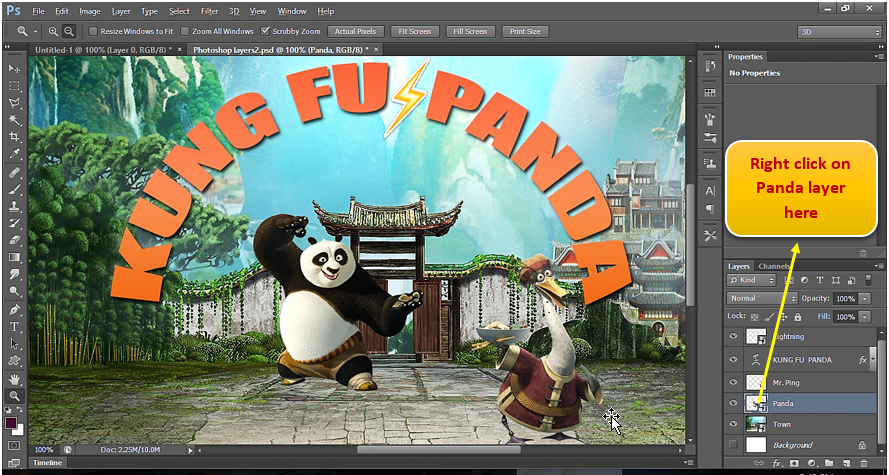
Right click on Panda layer on left side as shown above and click on Select pixels as shown below:

Now click on circled area shown below:
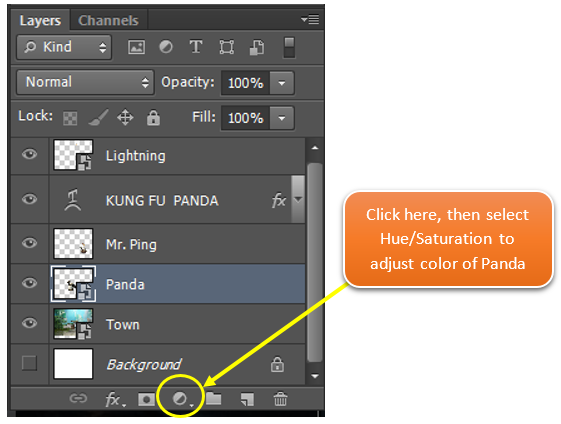
Now click on Hue/Saturation as shown below:
Now change the Hue/Saturation attributes as shown below to change the color:
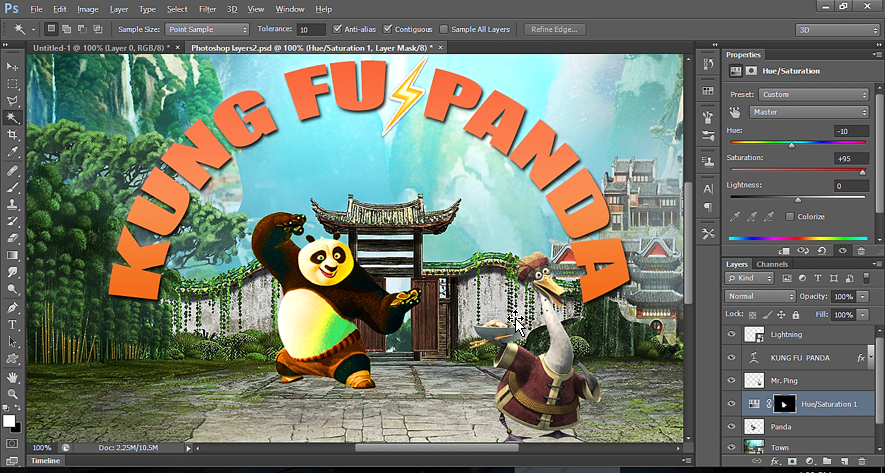
Similarly, we can edit all image segments by changing its shape/size/color/position etc.