Blur tool in Photoshop
Blur tool in Photoshop is used to blur the pixels in an image.
We can select this tool and drag the cursor on any area on the canvas to blur it.
Many times, we want a face in the picture to be in focus or we want to highlight a person’s photo among the crowd. For this, we may use blur tool to remove focus of unwanted things in the photo by blurring them.
Let’s see how to use blur tool in Photoshop.
Blur tool example in Photoshop - Remove focus of unwanted things on the canvas
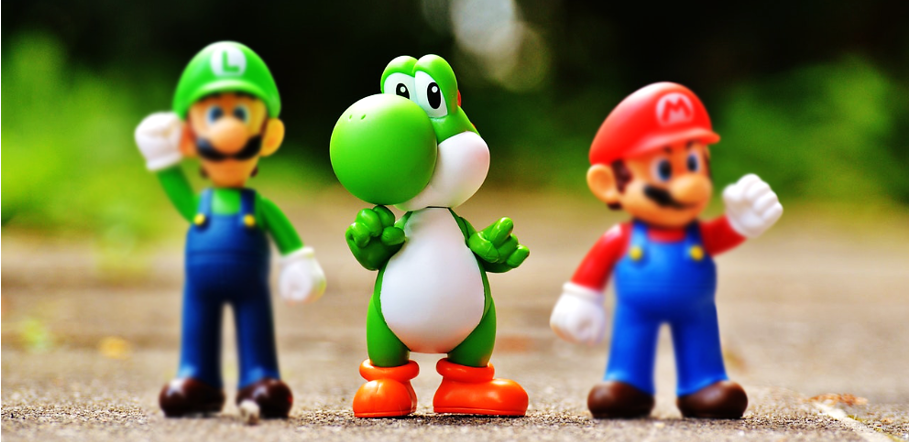
Let’s open below image in Photoshop.
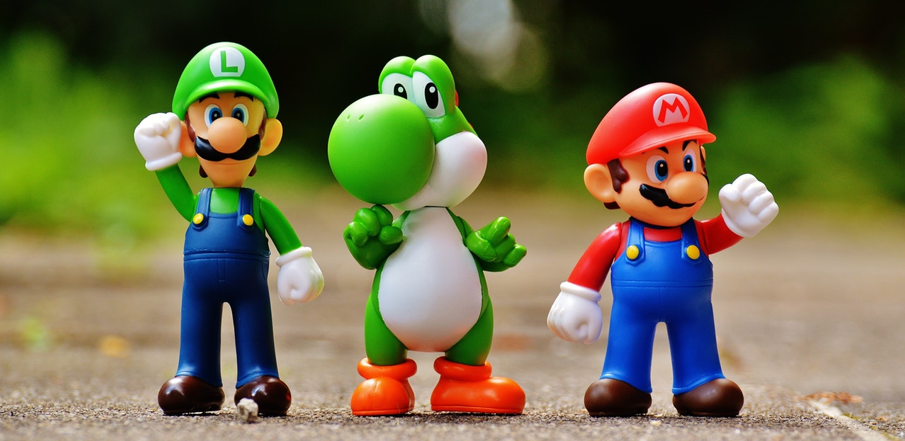
In this pic, all three toys are in focus. If we want to put only the central one in focus, then we can simply use the blur tool to blur rest of the toys and make them unfocused. See how we do it.
Select Blur tool  and drag the cursor over toys other than the middle one.
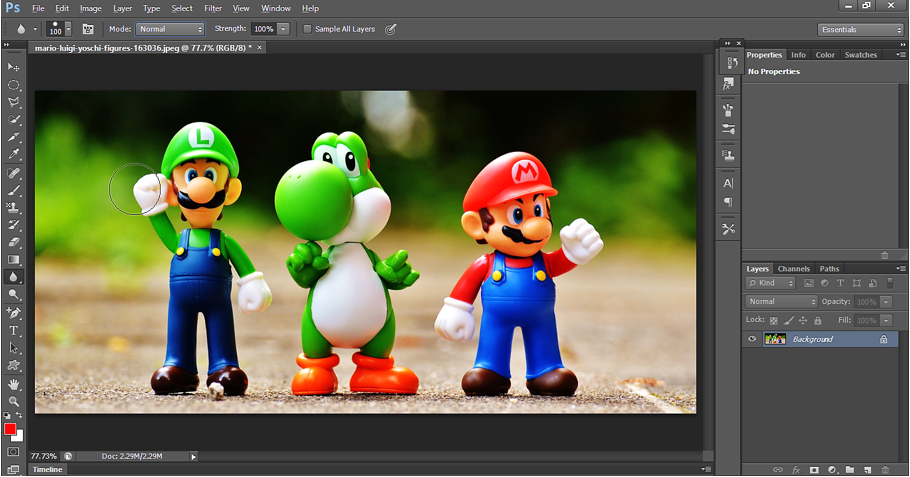
First blur the leftmost toy by dragging the cursor over it.

Now do the same over the rightmost toy.
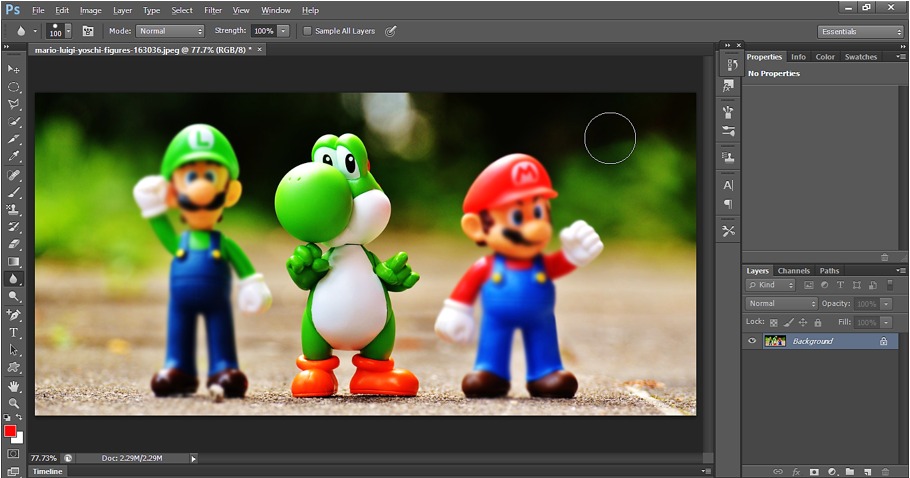
Blur tool output:
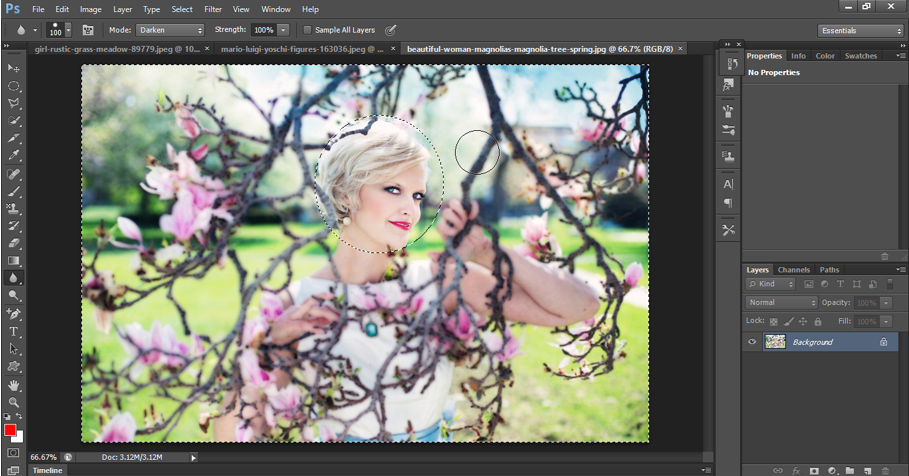
Blur tool example in Photoshop - Blur a Selection on the canvas
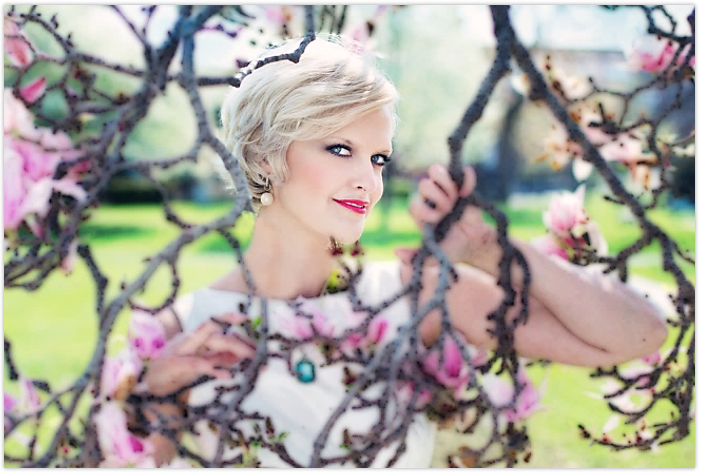
We can use blur tool to blur specific selection on the canvas. To see how we do it. Let’s open below image in Photoshop.
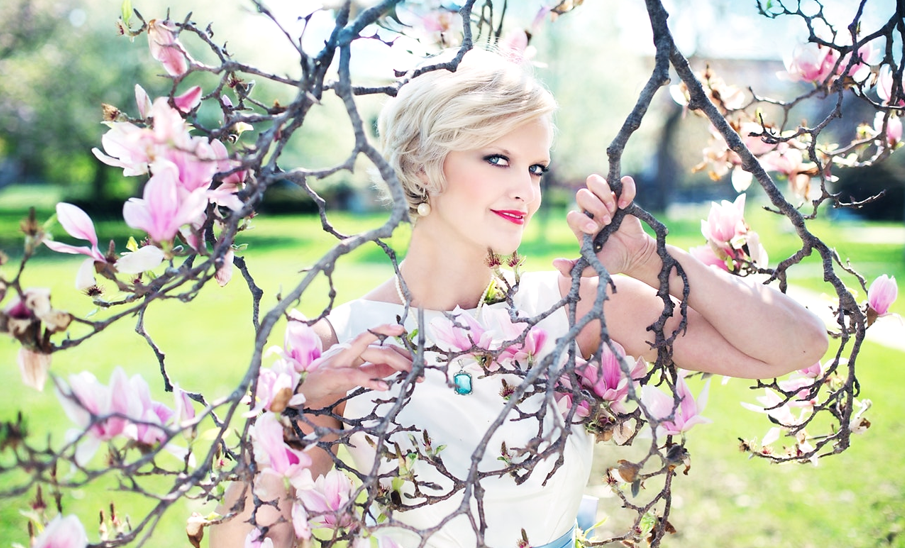
Now use elliptical tool  to draw a circular selection around the face of the girl.

Once the circular selection of face is done, right click and ‘Select Inverse’ to make Inverse selection of the canvas.
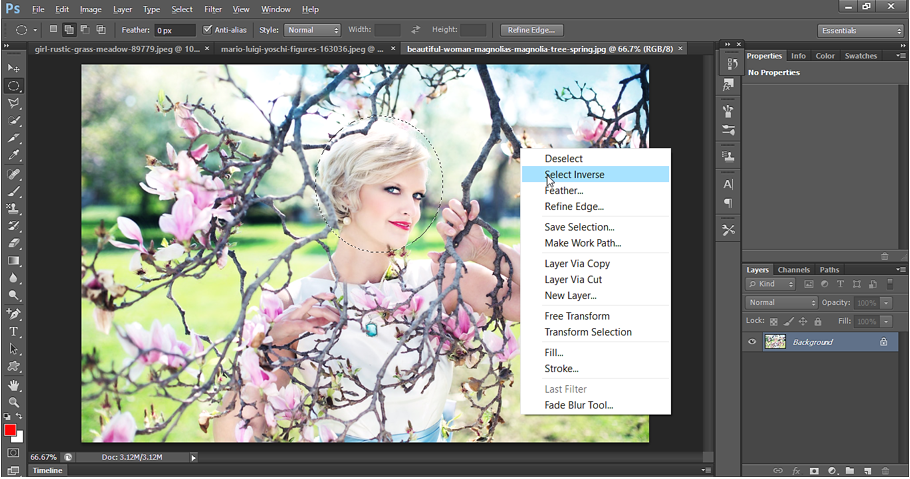
Inverse selection will have the selection of whole canvas excluding the circular face. See below.
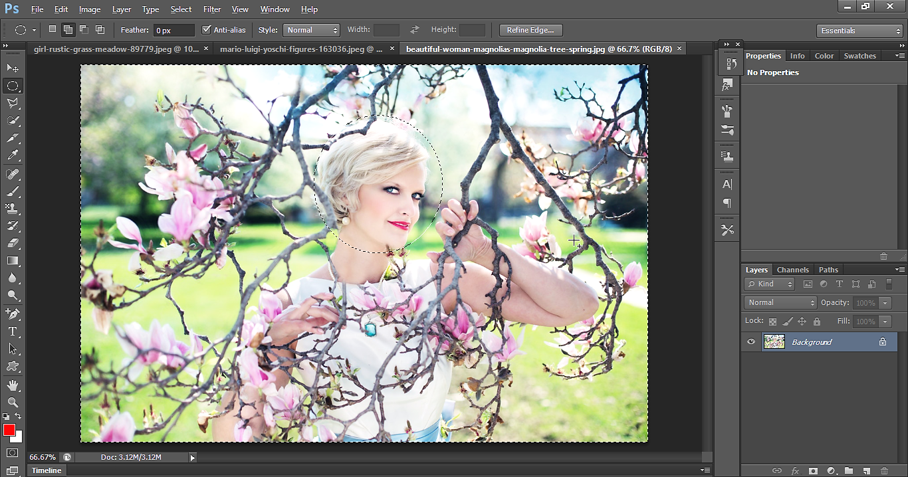
Now select Blur tool and set the Mode to Darken. Darken mode will darken the pixel while blurring it.

Now just drag the cursor over whole canvas. Since the face is not in the selection, even we drag the cursor over face, it doesn’t get blur and this is the feature of selection.
Blur tool output:
Sharpen tool in Photoshop
Sharpen tool in Photoshop is used to sharpen the pixel in a photo. It is just opposite of Blur tool. Many times, we find some places where pixels look dull and we must sharpen it to make the image look better.
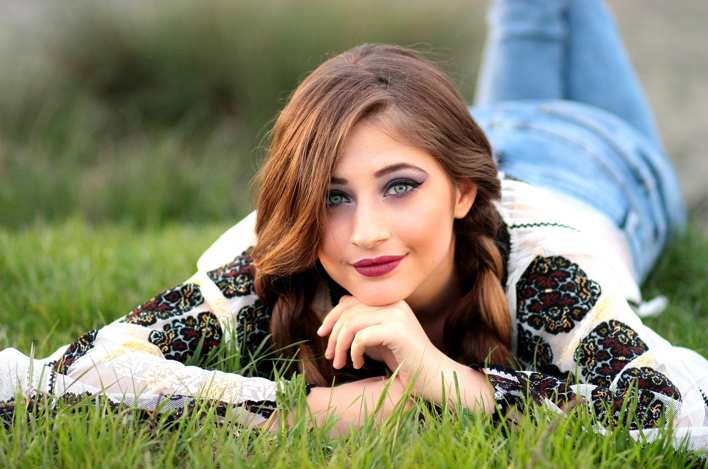
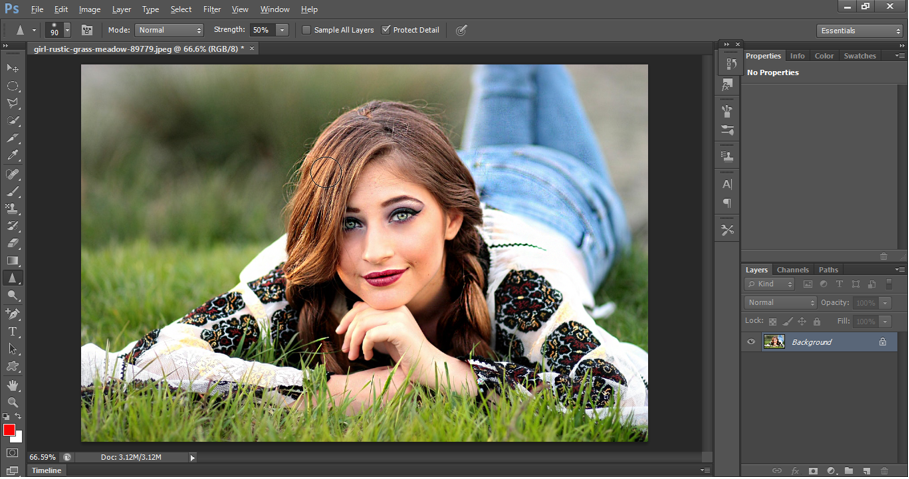
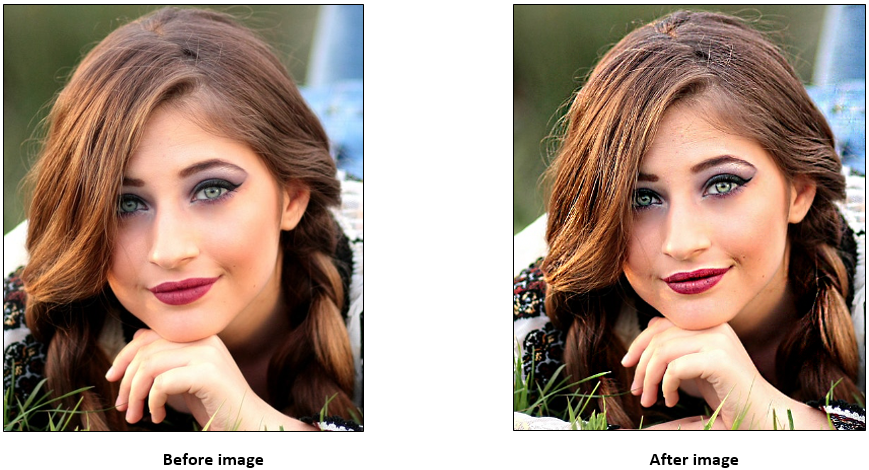
Let’s open below image in Photoshop. In below image, we will sharpen some of the areas like here hair. Pixels of the hair will become more sharp, clear and shiny. Similarly, we will sharpen eyes and lips.
Select Sharpen tool  and drag it over the part we want to sharpen. You must watch carefully while applying it again and again on the same area. Pixels may become too much sharp making the photo look odd.
Below is the setting in Option bar.

Now drag the cursor over hair using the sharpen tool. Hair starts shining. Avoid sharpen strokes too many times at the same place . After hair apply the sharpen tool on eye and lips.
Output – Sharpen tool
In the output, we can see the difference in pixels of hair, eye, lips.
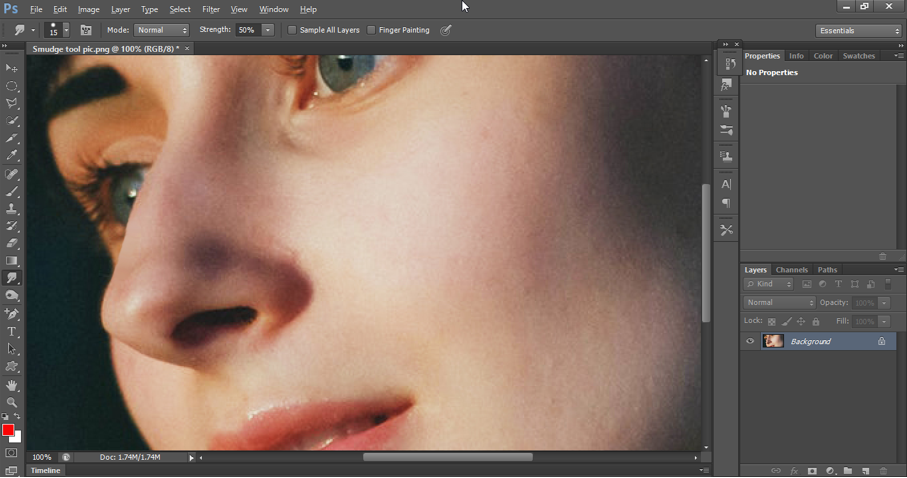
Smudge tool in Photoshop
Smudge tool in Photoshop can be used to move pixels of one area to another area by pushing the pixels. Smudge tool just acts like wet paints and we can drag the color of one area to smoothly push it to required area. Let’s see it with an example.
Smudge tool example in Photoshop - 1. Deal with imperfection around the edges
Let’s open below image in Photoshop application.
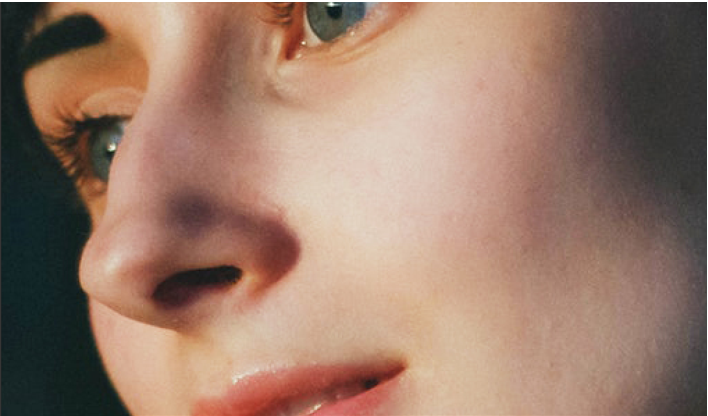
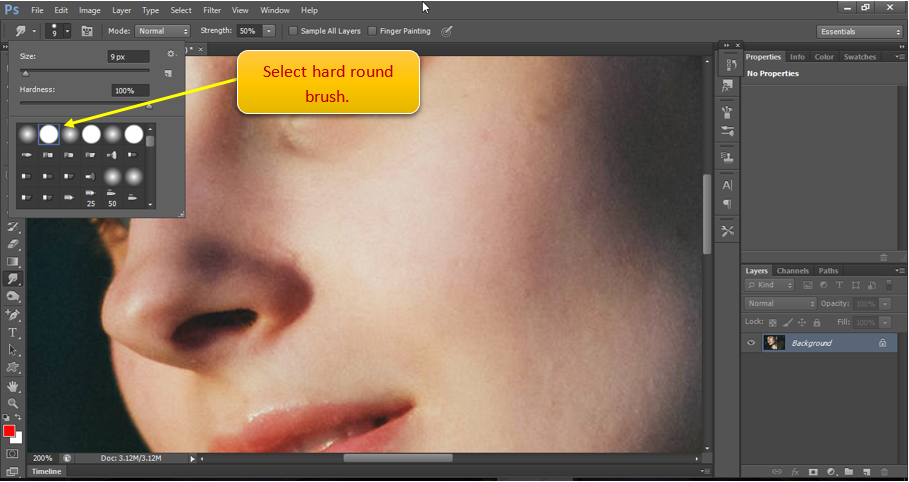
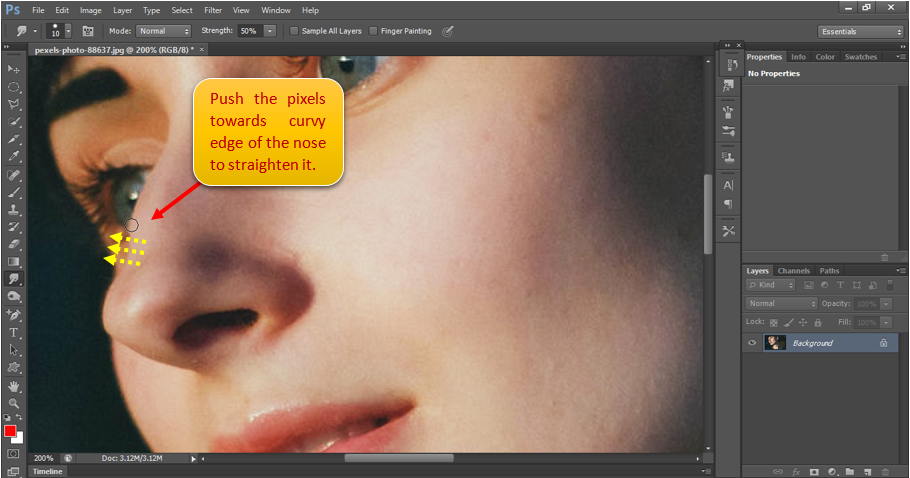
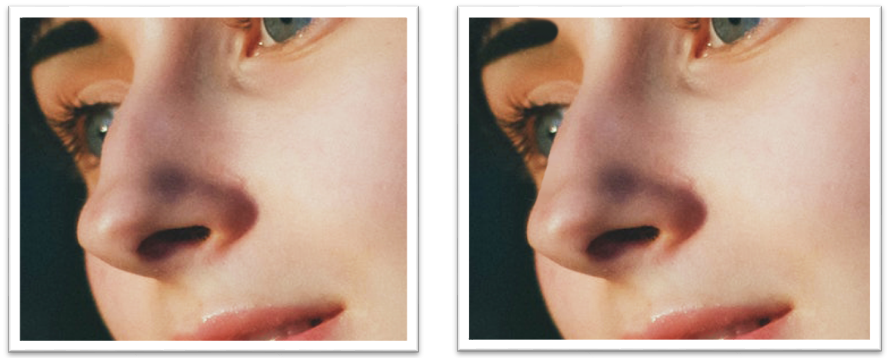
In this pic, first we will correct the edges of the nose to make it look straight. Select Smudge tool  . Using smudge tool, we will push the pixels around the bend nose area towards it edge, to straighten the nose edge.
For this select Hard round brush. If we select soft round brushes, then when we push the pixels it will give blurry look at the edges of the nose. So, it is better to select hard round brush to see maintain sharp edge of the nose.
Now start pushing the pixels toward the curvy edges of the nose as shown below:
After pushing the pixels around the area, we get below result.
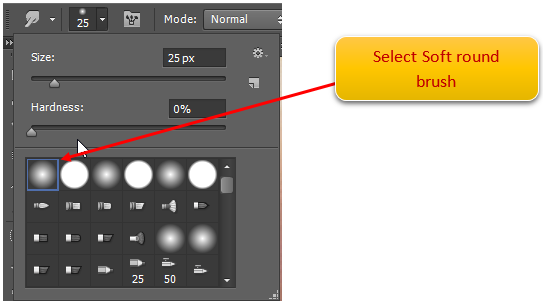
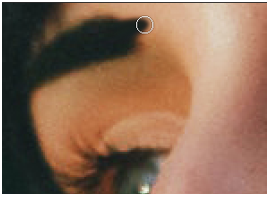
Now we extend the eyebrowalso using smudge tool by pushing the pixels. For this we will use soft round edge bush.
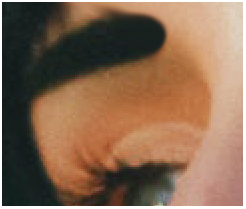
Now apply smudge tool to push the pixels to expand eyebrow as shown below.
Below is how the final pic look like after pushing the pixels around the area.
Smudge tool Output:
In below output, we have sharpen the nose using smudge tool
Note: We can get the same result by using Liquify tool(Shift+Ctrl+X) available under menu option ‘Filter’.
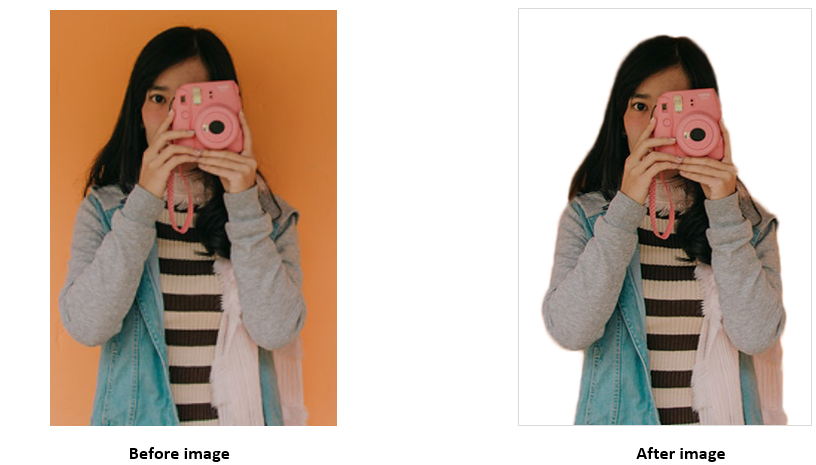
Smudge tool example in Photoshop -2. Deal with imperfection around the edges
Smudge tool in Photoshop can be used for smoothing the edges of an image. Sometimes after removing the background, we get sharp curves around the edges which leads to imperfection in the image. To correct the edge of image, we must get rid of those sharp pixels. We can do it by smoothening those pixels.
Let’s see below image in Photoshop application:
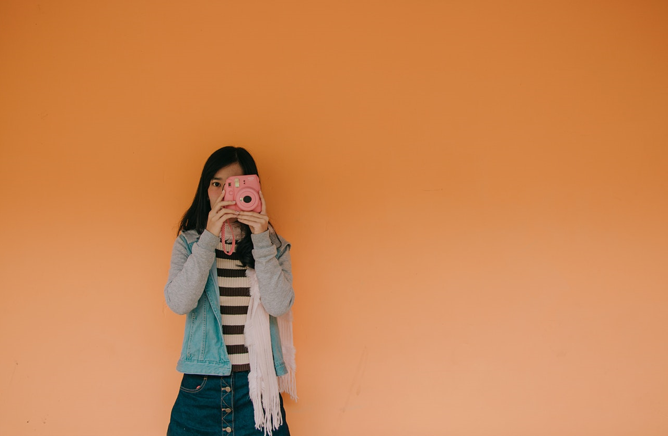
Now use Quick selection tool  and make the Selection of the background.

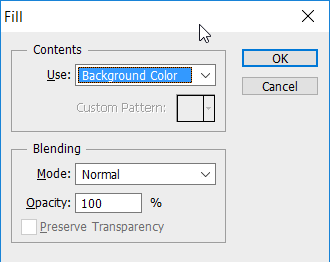
Now press 'Delete' to delete the selection. When we press delete it ask for the Fill option. Select Background Color.
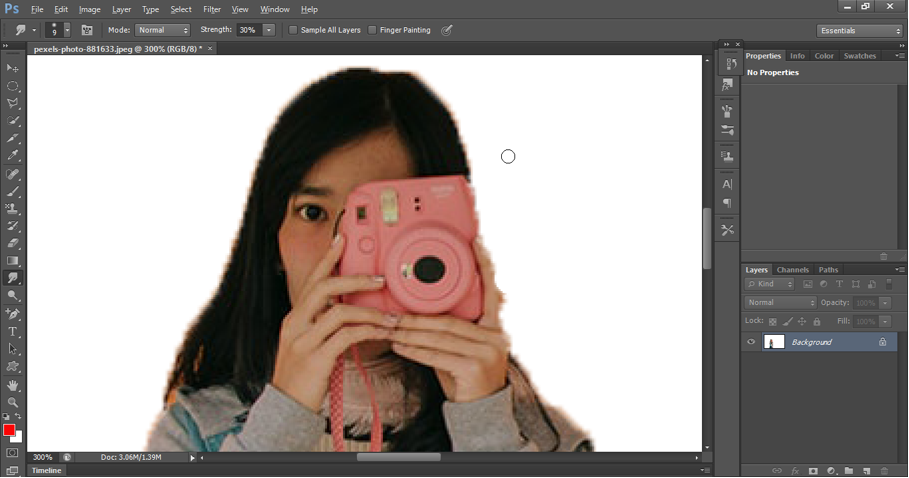
As we can see below, the edge of the pic doesn’t look good. It has pixels of background as well as the pixels looks sharp at some places. Here we will use smudge tool to smoothen the edge. We will drag the cursor slightly from inside, so that it picks the most colors from inside and apply it on the edges.
After applying the smudge tool and smoothing the curve, we get below output. But still the pixels on the edges are not perfect. First we need to remove the background color pixels on the edges. For this just push the pixels inside using smudge tool.
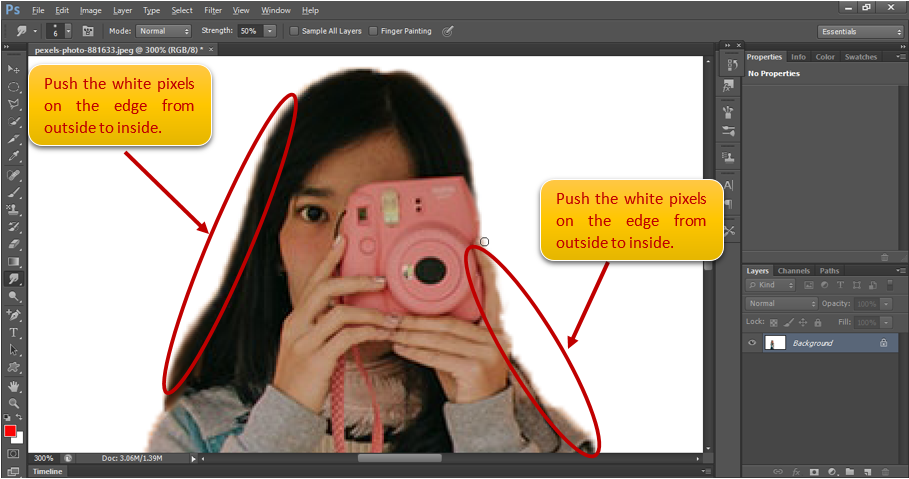
After pushing the background edge pixels inside, we get below result. Now it looks good.

Below is the final result.
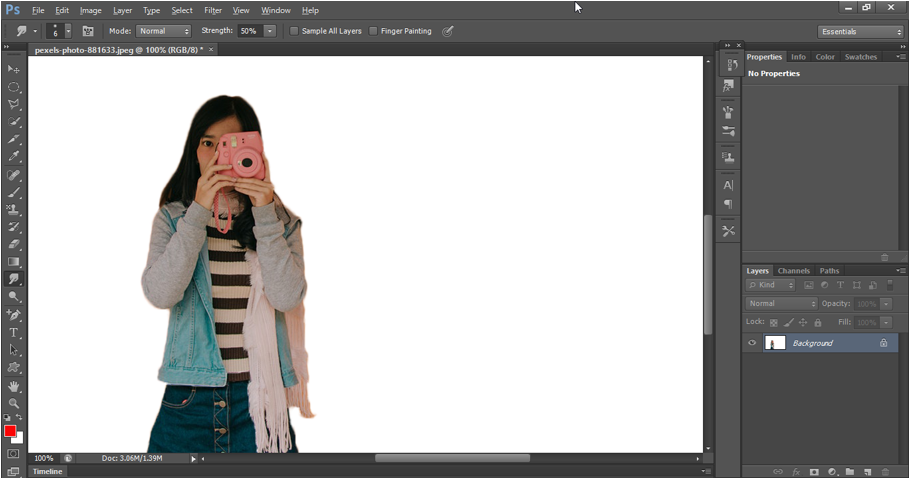
Smudge tool output: