Blending Options and Blend Mode in Photoshop
Blending in Photoshop means mixing of two things in such a way that the constituent parts are indistinguishable from one another.
Similarly, Blending in Photoshop means how two Layers blend with each other.
In previous chapter, we saw how to apply different Layer styles on a Layer. While we apply Layer style on the Layer, we can use different method to blend these styles in the layer which may result in different Layer styles. Hence, Blending in Photoshop also means how Layer styles like color/gradient/pattern/shadow/glow/opacity mixes with a layer.
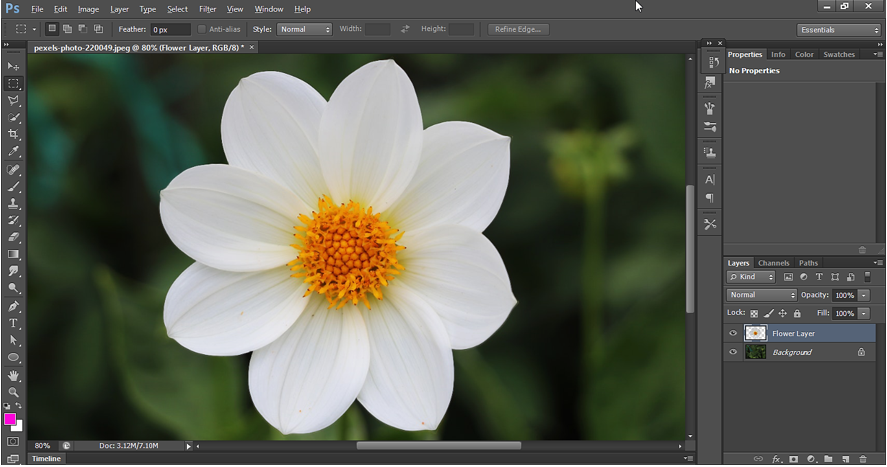
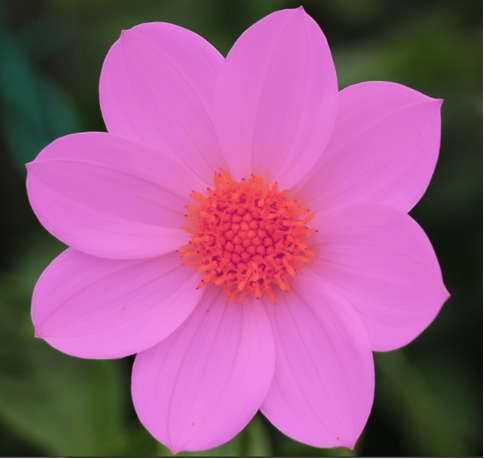
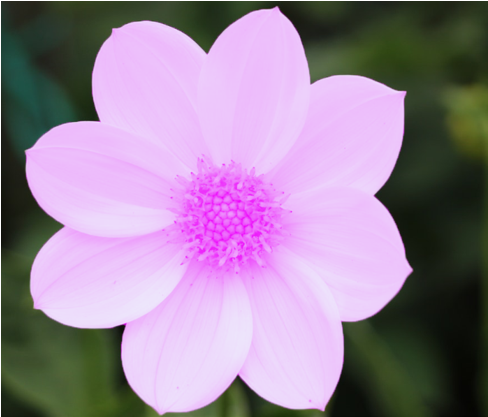
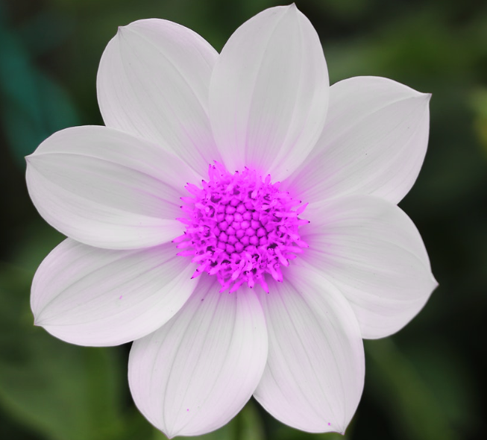
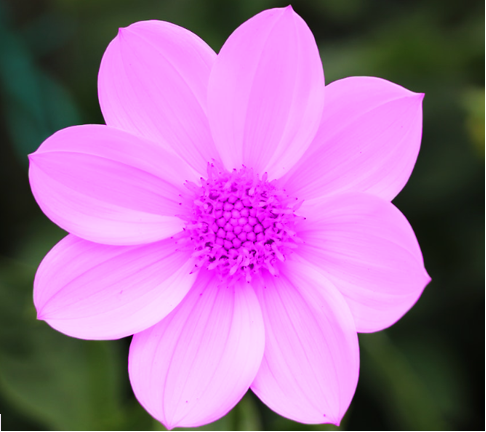
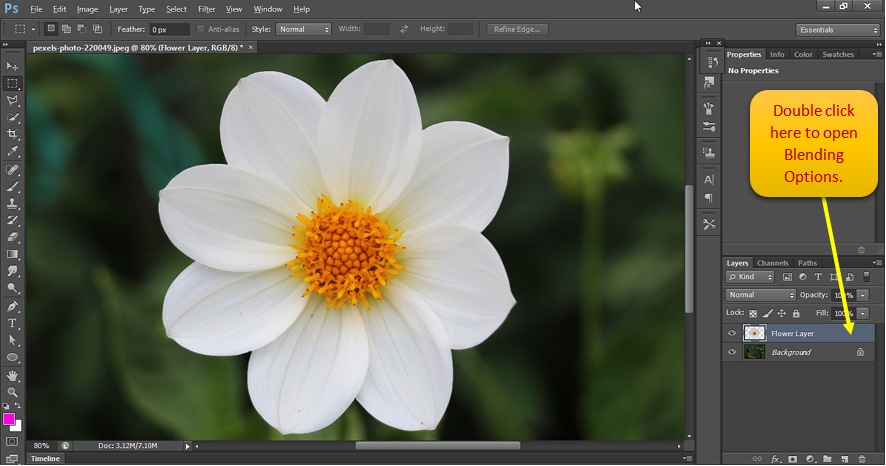
Let’s open a Flower image on a background layer as shown below. Hence we have 2 layers here- Flower Layer & Background Layer.
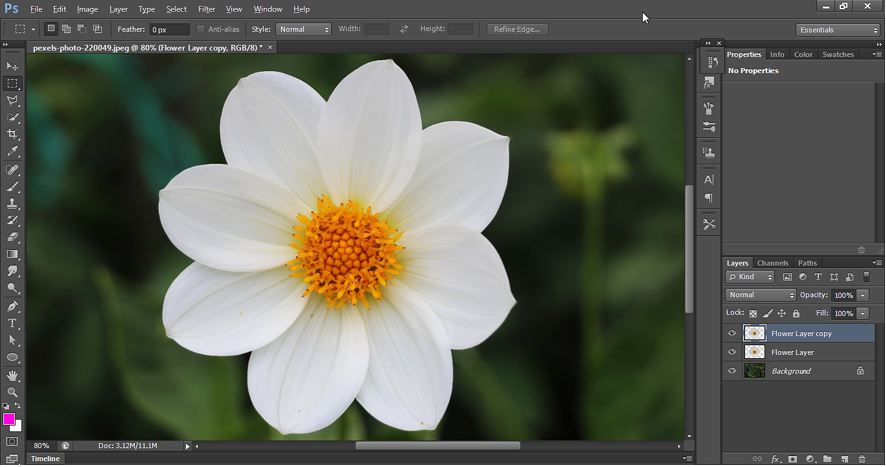
Before we discuss how 2 Layers can blend with each other, let’s create another layer which we can Blend with the Flower Layer.
To create another layer, right click on the Flower layer and click duplicate Layer to duplicate it. Duplicate layer name is “Flower copy”. See below.
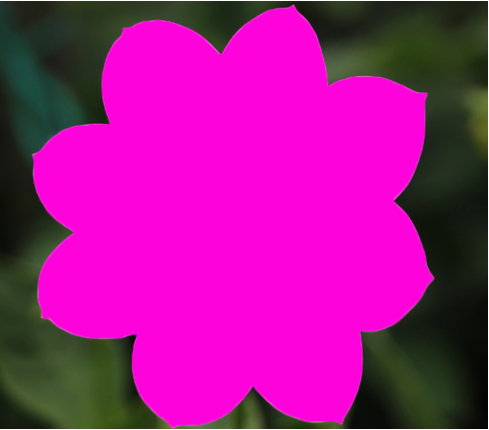
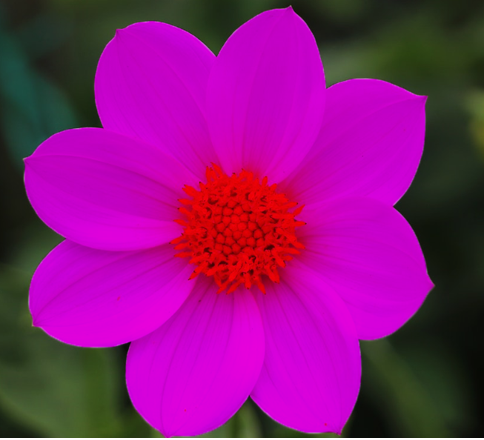
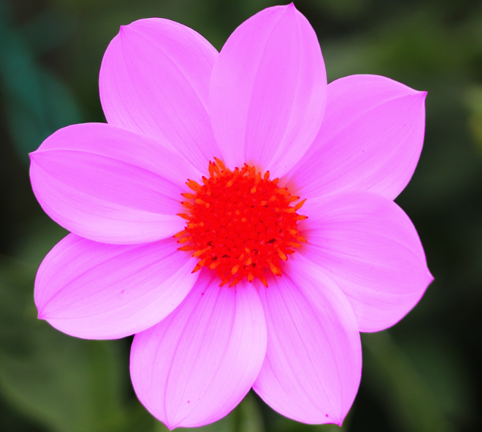
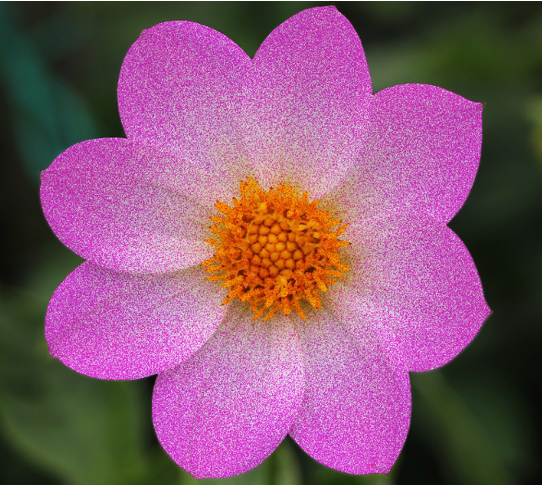
Now color this Flower copy with pink color using brush tool as shown below. Rename the layer which we colored with Pink as Pink Layer.

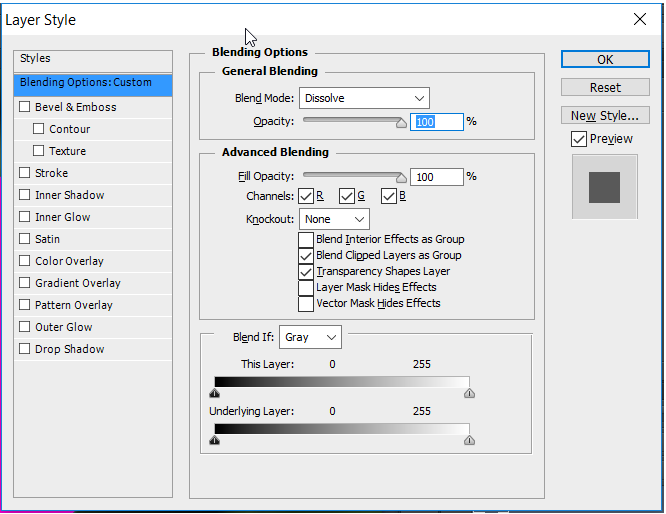
Now right click on the layer and select Blending options. It open Blending Options window. We can also double click at extreme right of Flower Layer to open Blending Options. See below:
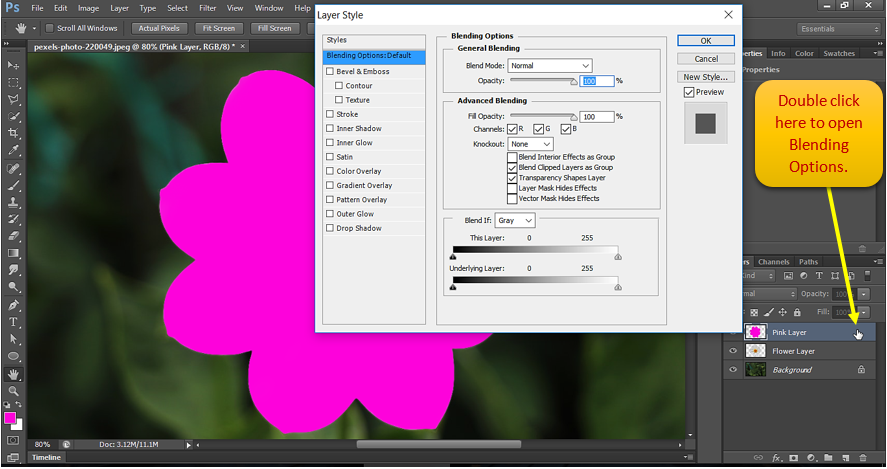
A window pops up when we click on Blending Options.
Click on ‘Blending Options: Default’ on the left to see the attributes for Blending options on right panel.
We can see Blend Mode as an attribute. Blend mode tells us, how two layers will ‘mixes / blend’ into each other. We can expand the Blend Mode to see all the values available for Blend mode:
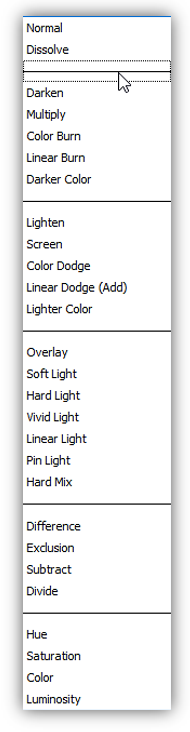
Blend Modes:
Below is the list of Blend Modes. As we can see below, Blend Modes have been divided into different groups. The effect of Blend Modes belonging to the same group will be similar in nature.
Let’s discuss the effect of using different Blend modes. But before that let’s have some assumptions:
When we use Blend modes, Color of one Layer will mix or blend with Color of another Layer. Here, we are going to blend Pink Layer over the Flower Layer. Here, the color of Flower Layer may change after blending color of Pink Layer.
In upcoming examples, we have below assumptions:
• The base color is the original color of Flower Layer.
• The blend color is the color being applied on Flower Layer.
• The result color is the color resulting from the Blend mode.
1.a Normal Blend Mode
The result color will have the color of upper layer (Pink Layer) i.e. each pixel of Upper layer will cover the pixels of Lower layer. Hence, in actual, Normal Blend Mode doesn’t blend any pixels of Upper Layer on Lower Layer. Therefore, always pixels of Upper Layer will be visible in Normal blend mode.
Settings for Normal Blend Mode:

Normal Blend Mode Output:

Yet there is another way, we can see the blending effect in Normal Blend Mode. To see a blending effect in Normal Blend mode, we can control the Opacity/Fill slider. Opacity/Fill slider controls the opacity of Upper image over Lower Image. Similarly, Fill slider will control the pixels Fill rate of Upper Image Over Lower Image.
Set the opacity to 40% to make the flower less Opaque and hence revealing the background layer partially. 0% opacity means, Flower will be completely Invisible.
Settings for Normal Blend Mode:

Normal Blending Mode (Opacity 40%) Output -
1.b Dissolve Blend Mode
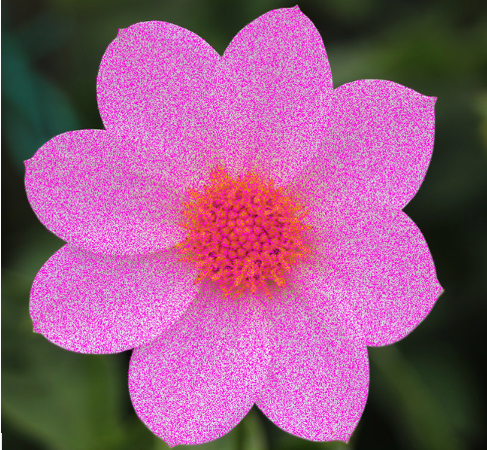
As clear from its name, in this Blend mode, pixels of upper layer is dissolved in lower layer. When the opacity is 100%, no pixels will be dissolved but as we decrease the opacity the pixels of Upper Image will start dissolving in Lower Image giving a noise like pattern. When we set the Opacity to 0, then the pixels of Upper Image are completely dissolved in Lower Image.
Settings for Dissolve Blend Mode:
Dissolve Blending Mode (Opacity 100%) Output -
Settings for Normal Blend Mode:

Dissolve Blending Mode (Opacity 40%) Output -
2.a Darken Blend Mode
All the Blend Modes like Darken, Multiply, Color Burn, Linear Burn, Darker Color are used to Darken the color.
It compares the color pixels of base color and blend color and gives the result color based on, whichever is darker.
Darken Blend Mode Output:
2.b Multiply Blend Mode
It multiplies the base color by the blend color. The result color is always a darker color.
For any type of calculation, first the pixel color is standardized. The pixel color values vary from 0.0 (black) to 1.0 (white).
e.g.
Black Color(RGB) = (0,0,0)/255 = 0,0,0
White Color(RGB) = (255,255,255)/255 = 1,1,1
Gray Color(RGB) = (128,128,128)/255 =0.8,0.8,0.8
Similarly, we can calculate standardized values for other colors.
Now Multiply Blend Mode works on below formulae:
f(a,b) = ab {Where a & b are in Range(0,1)}
Hence,
f(Base Color, Blend color) = Base Color * Blend Color
f(Base color, Black) = Base Color * Black = (r,g,b) * (0,0,0) = (0,0,0)
f(Base color, White) = Base Color * White = (r,g,b) * (1,1,1) = (r,g,b)
It means, multiplying any color with black produces black. Multiplying any color with white leaves the color unchanged.
Multiply Blend Mode result for Base Color as Red & Blend Color as Gray
f(Red, Gray) = Red * Gray = standard(255,0,0) * standard(128,128,128) = (1,0,0) * (0.5,0.5,0.5) = (0.5,0,0) = 128,0,0 (Blood red)

2.c Color burn Blend Mode
It darkens the base color to reflect the blend color by increasing the contrast between the two. Blending with white produces no change.
Below is an example of Color Burn. Please visit Photoshop examples to see how we use color burn.
2.d Linear burn Blend Mode
It darkens the base color to reflect the blend color by decreasing the brightness. Blending with white produces no change.
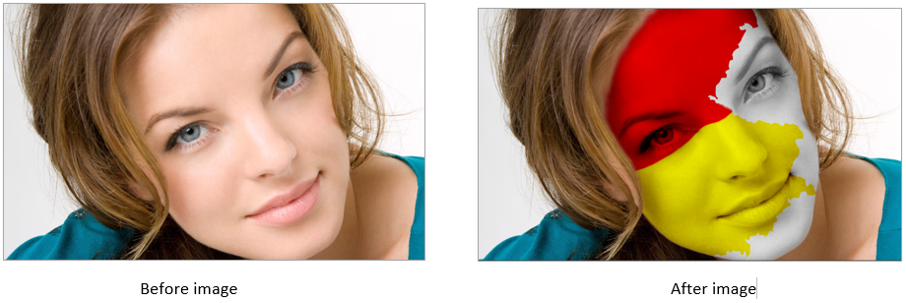
2.e Darker Color Blend Mode
Darker Blend Mode Compares the total of all channel values for the blend Color and base Color. Then it displays the lower value color.
To illustrate Darker Color, let’s take an example.
Open Photoshop application, select Text tool and write some text on the background Layer as shown below. Here we have used Font=”Gill Sans Ultra”.
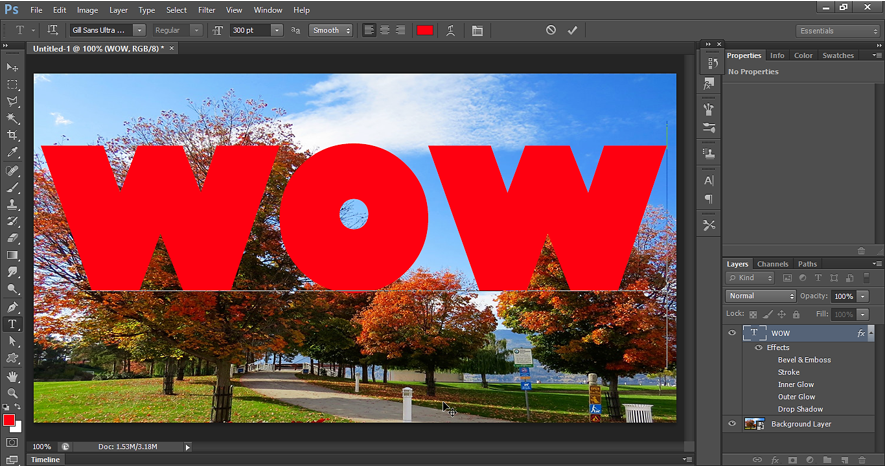
Put some shadow and outer glow.
Now put an inside stroke. For inside stroke, the Fill Type is Pattern. Increase the stroke size so that the text is completely filled with stroke pattern. Here the stroke pattern is made up of black, white and red color, which are the colors needed to understand Darker Color Blend Mode.
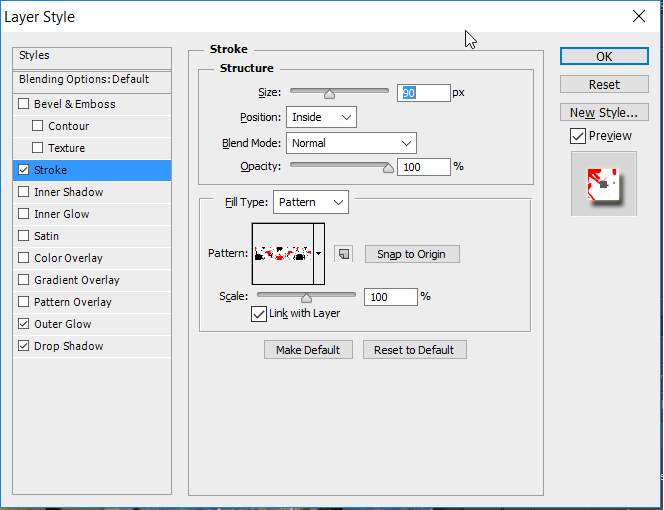
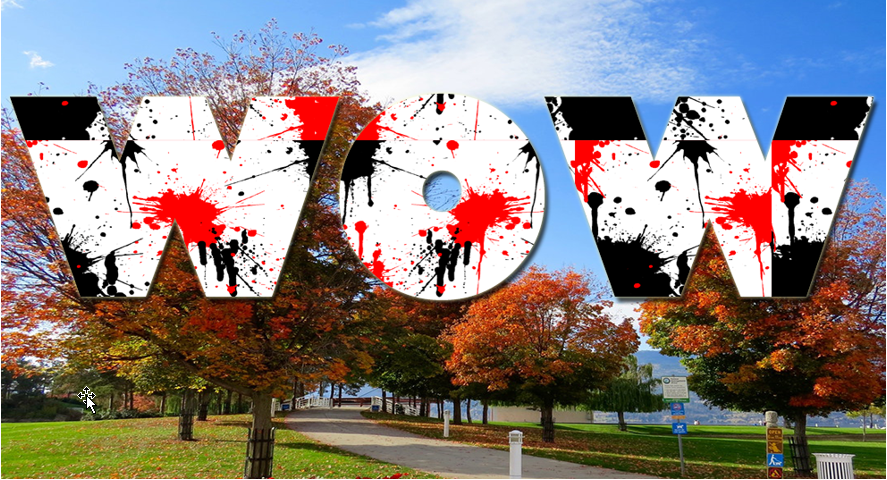
Below is how the Text looks like after applying the inside stroke with Pattern.
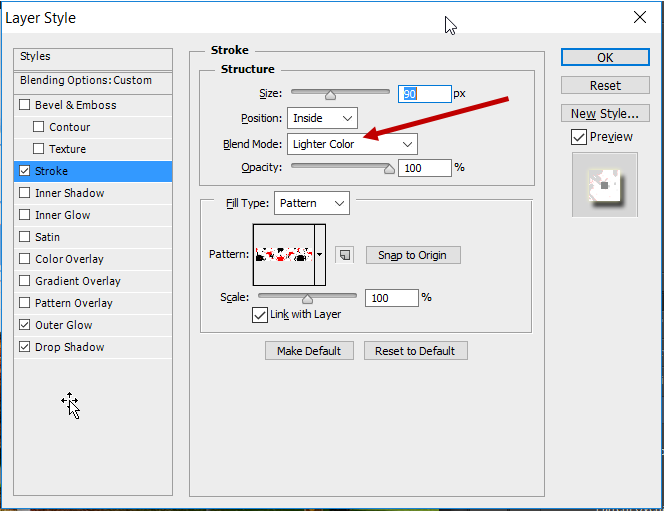
Now change the Bend mode in Stroke pattern. Instead of Normal Blend mode, select Darker Color Blend mode. Below are the settings in Layer stroke.

So, what will be the result of changing Blend Mode from Normal to Darker Color?
To get to the conclusion, first see the definition of Darker Blend Mode. As we know, Darker Blend Mode compares the total of all channel values for the blend color and base color and displays the lower value color.
White color has RGB channel values as R=255, G=255, B=255. Its total of all channel (R+G+B) will be always greater than any other color’s RGB channel total. Hence for white blend color, always base layer color will be selected as the result color, as it will have the Lower value.
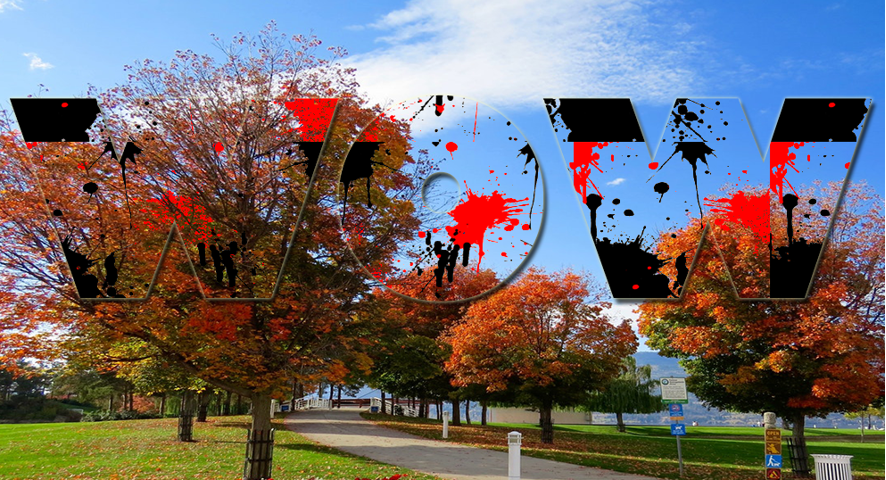
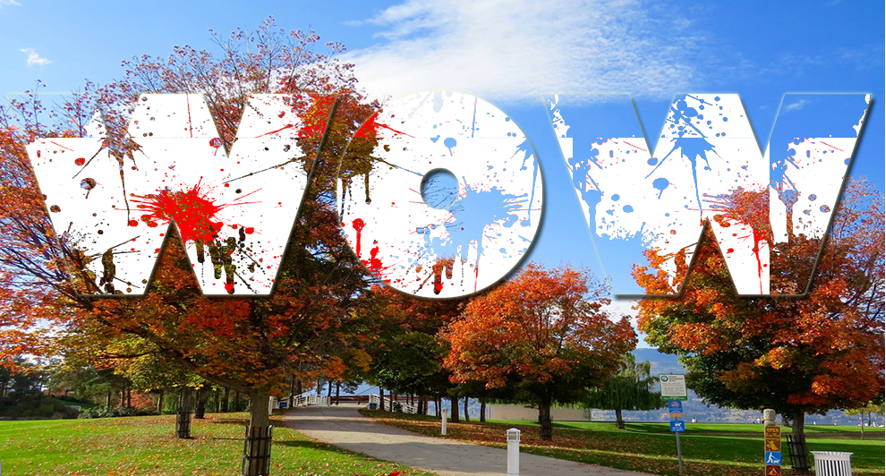
Hence in above image, white color on the image will disappear to reveal what is there in the background.
Similarly, Red color is partially displayed on tree background based on, which is the lighter composite color from the two; base color or blend color.
Output - Darker Color Blend Mode
3.a Lighten Blend Mode
All the blend modes Lighten, Screen, Color Dodge, Linear Dodge, Lighten Color belongs to the same group of Blend Mode and are used to Lighten the color.
This group produces the result just opposite of Group-2 Blending modes (Darken, Multiply, Color Burn, Linear Burn, Darken Color).
Opposite Blend Mode:
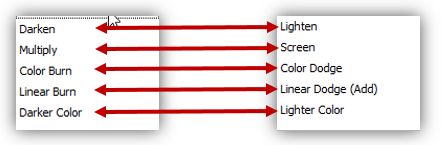
Lighten Burn compares the color pixels of base color and blending color and gives the result color based on whichever is lighter. It is just opposite of Darken. Pixels lighter than the blend color are replaced, and pixels darker than the blend color do not change.
Lighten Blending Mode Output-
3.b Screen Blend Mode
It multiplies the inverse of the blend and base colors. The result color is always a lighter color. This yields the opposite effect to multiply. Screening with black leaves the color unchanged. Screening with white produces white.
3.c Color Dodge Blend Mode
It brightens the base color to reflect the blend color by decreasing contrast between the two. Blending with black produces no change.
3.d Linear Dodge Blend Mode
It brightens the base color to reflect the blend color by increasing the brightness. Blending with black produces no change.
3.e Lighter Color Blend Mode
It is just opposite of Darker Color. It Compares the total of all channel values for the blend color and base color and displays the higher value color.
For this we will take the same example that we took for Darker Blend Mode.
Let’s change the Blend Mode from Normal to Lighter Color as shown below;
So, what will be the result of changing Blend Mode from Normal to Lighter Color?
To get to the conclusion, first see the definition of Lighter Blend Mode.
White color has RGB channel values as R=255, G=255, B=255. Its total will be always greater than other color values. Hence, if the blend color is white then it will be selected always as the result color since will have high value than other color. That’s why in below image, white color is shown as result color, hiding the base color behind it.
In case of black color, RPG value (0,0,0) will be always lower than any color value. Hence, if blend color is black, then always base color is displayed.
Output - Darker Color Blend Mode
4.a Overlay Blend Mode
All the Blend Modes Overlay, Soft Light, Hard Light, Vivid Light, Pin Light and Hard Mix blend modes belongs to the same group.
Overlay combines Multiply and Screen blend modes. It Multiplies or screens the colors, depending on the base color. The base color is mixed with the blend color while preserving the highlights and shadows of base color.
Overlay Blending Mode Output -
Overlay example -2
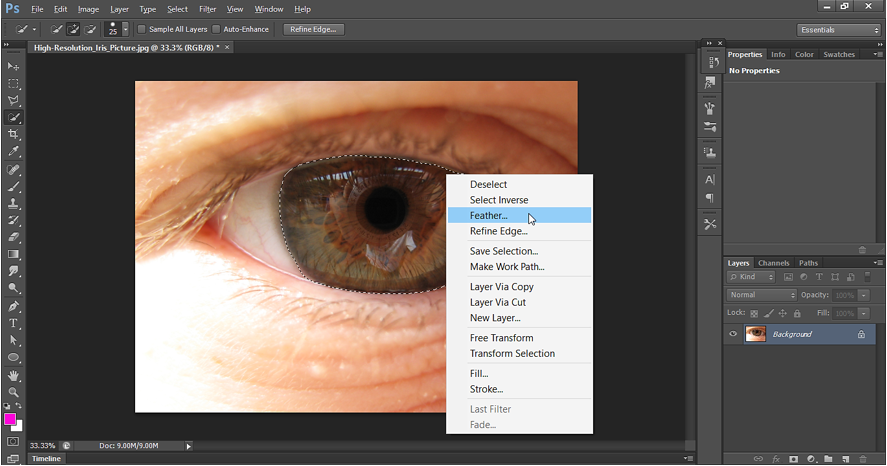
Open below image in Photoshop application. Make selection of the eye using Magnetic Lasso tool. We will cover this tool in upcoming chapters. After making Selection, add some feather to the selection to give some smoothness to the selection.
Now right click on the selection to do a Layer via copy.
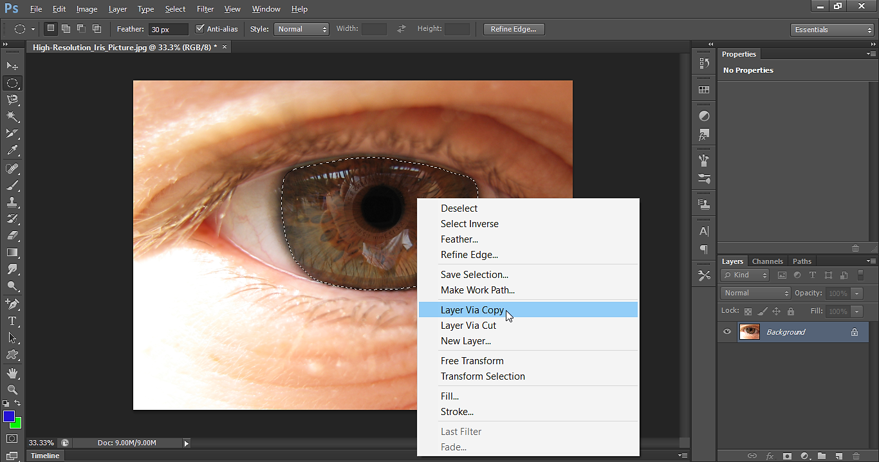
After Layer via copy, we get a new Layer which has only eye. Say the new layer is “Eye Layer”.
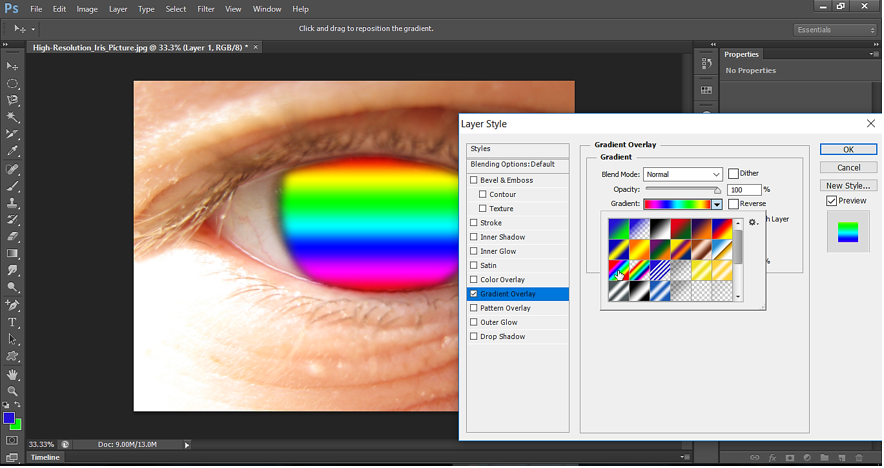
Now right click on the eye Layer and select Blending Options. Then select gradient overlay and do the settings as shown below and click OK.
Now change the graphics to raster graphics. To rasterize the eye Layer, right click and select “Rasterize Layer”.

Now go to Blending options and select Overlay as Blend Mode.
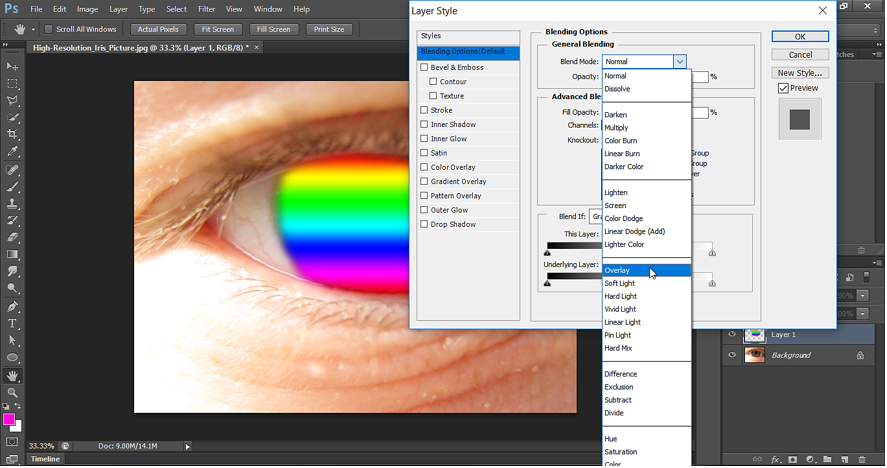
Output- Overlay Blend Mode

4.b Soft Light Blend Mode
It darkens or lightens the colors based on the blend color. If the blend color is darker than 50% gray, the image is darkened as if it were burned in.
4.c Hard Light Blend Mode
It multiplies or screens the colors based on the blend color. If the blend color (light source) is lighter than 50% gray, the image is lightened, as if it were screened.
4.d Vivid Light Blend Mode
It burns or dodges the colors by increasing or decreasing the contrast based on the blend color. If the blend color (light source) is lighter than 50% gray, the image is lightened by decreasing the contrast. If the blend color is darker than 50% gray, the image is darkened by increasing the contrast.
4.e Linear Light Blend Mode
Burns or dodges the colors by decreasing or increasing the brightness, depending on the blend color. If the blend color (light source) is lighter than 50% gray, the image is lightened by increasing the brightness. If the blend color is darker than 50% gray, the image is darkened by decreasing the brightness.
4.f Pin Light Blend Mode
If the blend color (light source) is lighter than 50% gray, pixels darker than the blend color are replaced, and pixels lighter than the blend color do not change. If the blend color is darker than 50% gray, pixels lighter than the blend color are replaced, and pixels darker than the blend color do not change.
5.a Difference Blend Mode
All the Blend Modes Difference, Exclusion, Subtract and Divide belongs to the same group. The result color is based on arithmetic calculation.
It subtracts the blend color from the base color or the base color from the blend color to find the brightness difference.
Difference Blending Mode Output -
5.b Exclusion Blend Mode
It creates the effect, similar to Difference mode but lower in contrast than the Difference mode.
5.c Subtract Blend Mode
It subtracts the blend color from the base color to create the result color.
Subtract Blending Mode Output -
5.d Divide Blend Mode
Looks at the color information in each channel and divides the blend color from the base color.
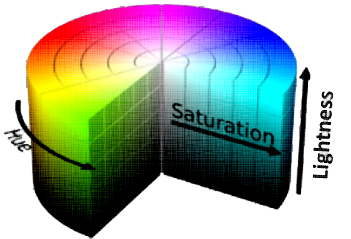
6.a Hue Blend Mode
All the Blend Modes Hue, Saturation, Color and Luminosity Blending Mode belongs to the same group.
Hue is a degree on the color wheel from 0 to 360. 0 is red, 120 is green, 240 is blue.
6.b Saturation Blend Mode
Saturation is a percentage value; 0% means a shade of gray and 100% is the full color.
6.c Lightness Blend Mode
Lightness is also a percentage; 0% is black, 100% is white.
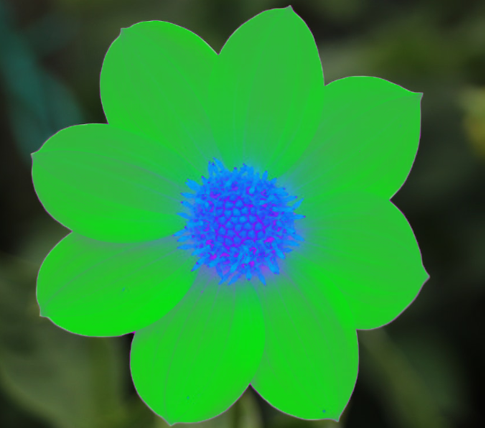
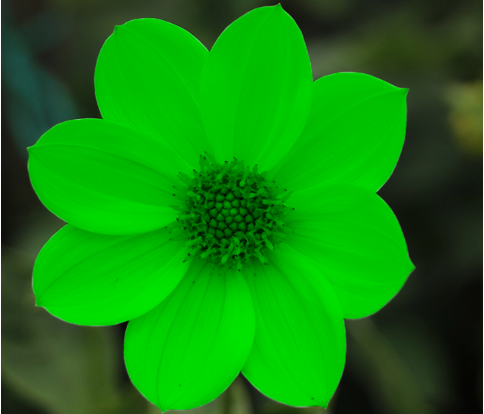
Hue Blending Mode Output -
Color Blending Mode Output -
Blending Mode – Part 2: Blend Layer styles with Base Layer
As we discussed earlier that other than Blending One Layer with another, we can also Blend Layer styles like color/gradient/pattern/shadow/glow/opacity with a layer.
Let’s delete the Pink Layer. Now we will do the Blend Mode test only on Flower Layer. Select Flower Layer as shown below:
Double click at extreme right of this Layer to Open Blending Options. Now see Blending Mode effect on the Layer for various Layer effect:
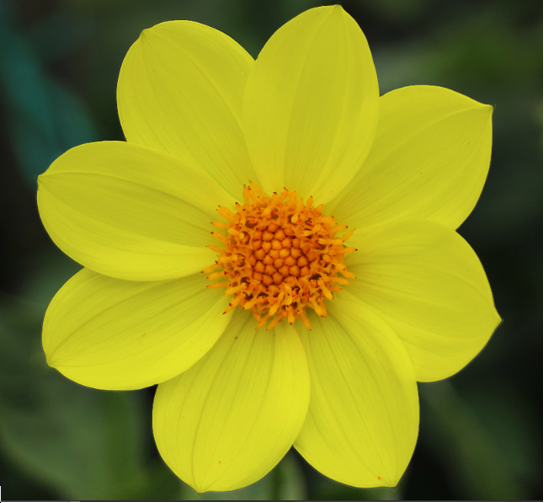
a. Color Overlay with Multiply Blend Mode
Let’s do the setting for Color overlay as shown below:
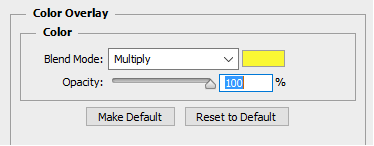
Output – Multiply Blend Mode
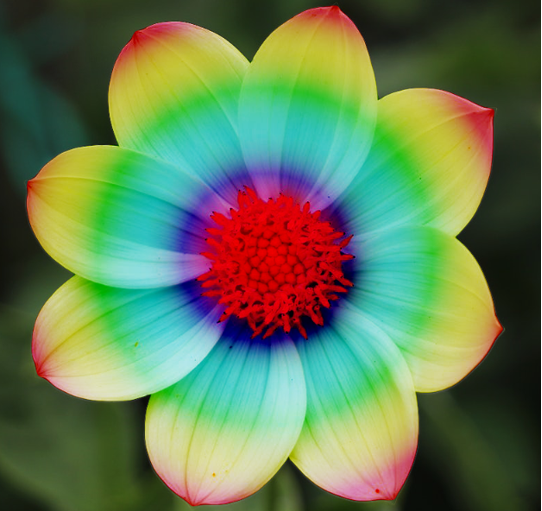
b. Gradient with Color Burn Blend Mode
Let’s do the setting for Color overlay as shown below:
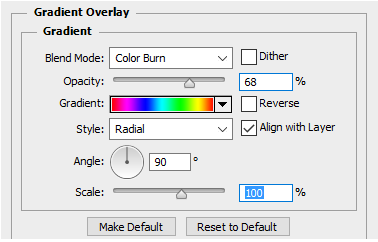
Output – Multiply Blend Mode
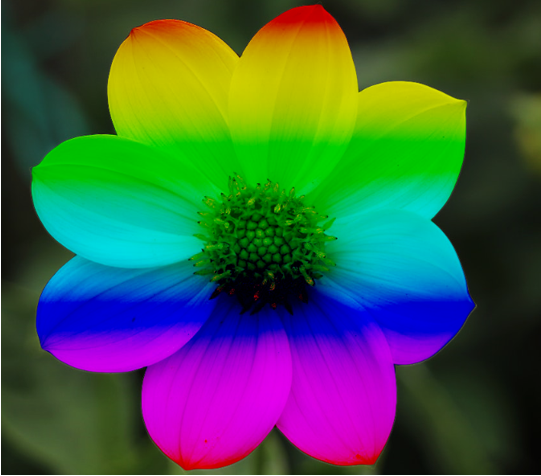
c. Gradient with Color Burn Blend Mode
Let’s do the setting for Color overlay as shown below:
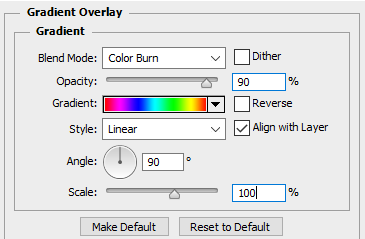
Output – Multiply Blend Mode
d. Inner Shadow Overlay with Multiply Blend Mode
Let’s do the setting for Color overlay as shown below:

Output – Multiply Blend Mode
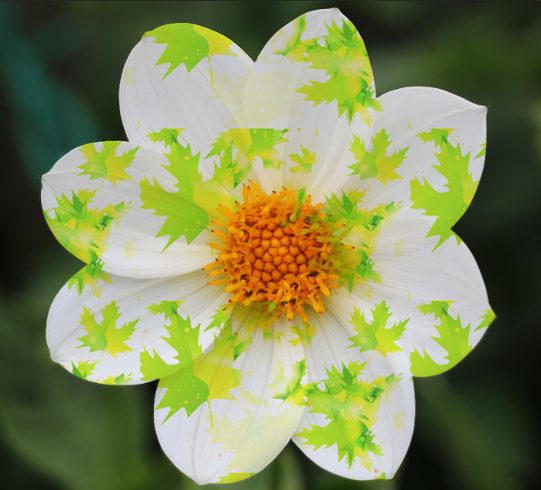
e. Pattern Overlay with Multiply Blend Mode
Let’s do the setting for Color overlay as shown below:
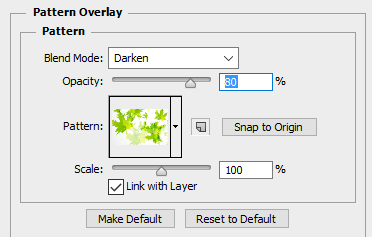
Output – Multiply Blend Mode